• Skip to main content
wwlogo-nm
  • blog
  • free stuff
  • for designers
    • explain weeknight
    • create client accounts
    • multiple site plans
    • tutorials
  • pricing
  • login
  • blog
  • free stuff
  • for designers
    • explain weeknight
    • create client accounts
    • multiple site plans
    • tutorials
  • pricing
  • login

Brittany

How to Plan a Personal Brand Photography Shoot

July 26, 2019 by Brittany 1 Comment

This week, we actually have the person that I trust with my brand photography, Christin Hume. We have had so many requests come in actually specifically about brand photography. I think the idea of brand photography intimidates people, especially when it comes to their website. Well fear no more everyone today, Christin Hume is here to shed some light on brand photoshoots to get you off and running!


Can you explain the difference between a brand photoshoot versus a family portrait session?

Whenever you’re doing a normal photoshoot, it’s always around a special event or a relationship that you have if you’re doing like engagement photos or family photos. A lot of my work that I do is actually revolved around weddings, which is more of a documentary-style shoot.

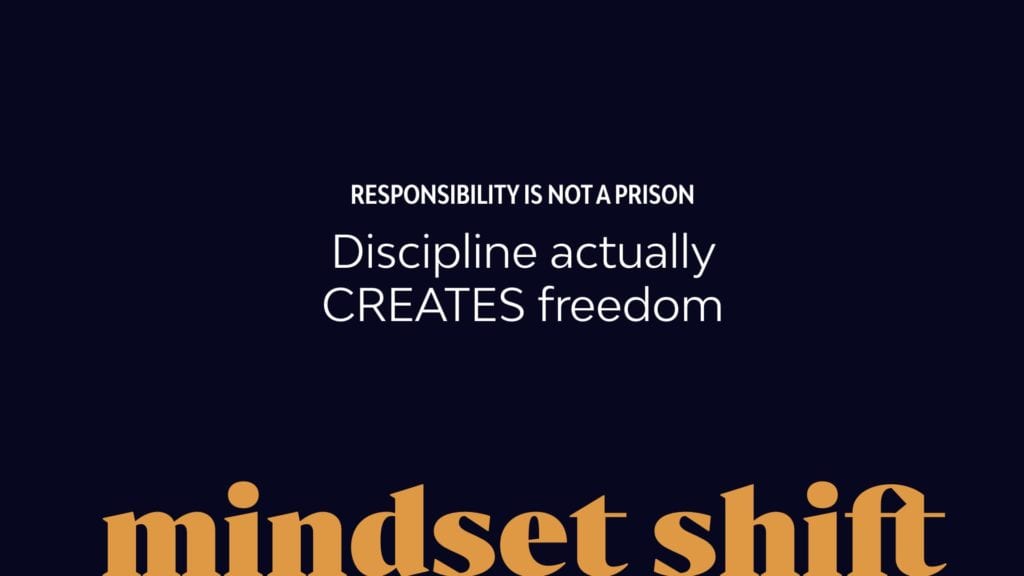
However,  when doing a brand photoshoot, what you really want it to be about is you. You’ve got to get over your fear of being in front of the camera because as a brand, you are representing your company and so people want to see you. They want to see your face, they want to know what you’re all about. It’s showcasing you in your element but also your personality.

It’s not just documenting a moment, it’s actually encompassing everything that you are as a brand. You have to think, more broadly about what images are going to convey more than just “I’m in love” but what people feel about you.

So if you’re an artist, your brand photoshoot should probably be of you making art and showcasing your art. People love to see, behind the scene. Your photos should actually brand peoples hearts and minds for who you are and what you do.

You talked about getting comfortable actually being in front of the camera. Do you have any tips on that?

Well, it’s funny because I can give these tips all day long, and then the second I get behind the camera I’m like, “don’t look at me”. I would say the biggest thing is just having a connection with your photographer. Go get coffee beforehand if you’re super nervous. Learn that they’re actually a human too and they’re not judging you. When I’m behind the camera, my job is to capture who you are and the more comfortable you are with your photographer, the better.

I feel like the biggest thing I’ve learned as a photographer is how relational photography actually is. The more I get to build a connection with my clients, the more successful the shoots are as well.

Some practical tips are to wear an outfit that you actually feel good in. Don’t try and pull off some new look that you’ve never tried before. Especially with brand photography, you want to dress and you want to look how you look in normal life. Don’t try and be crazy with what you’re wearing and how you’re representing yourself. Just be comfortable in what you wear and how your hair is and how your makeup is.

Also, trust the photographer whenever they’re telling you what to do with your hands or with your face or turn your head this way. Mainly guys can get so awkward.

How do I pick the right photographer for me and where can I find them?

This question is interesting because I’ve never actually searched for brand photographer specifically. But, I would say number one is just like Instagram stalk the heck out of people. For instance, if I went to someones, Instagram and saw pictures I liked I would reach out and ask them who took their photos. People love referring amazing photographers to other people. I love getting to tell my friends about other photographers that do amazing work. It brings me so much joy. They get business because of people connected to me.

Keep in mind, not all photographers can do the same quality of work. However, I also want to say if you’re just starting out and you don’t have a multimillion-dollar company, you may not need to hire a photographer who’s charging thousands of dollars to do a branding photoshoot.

Find a photographer who’s kind of at the same level that you are in your business to really help you build your business. Because honestly, you just got to have photos that represent your brand, especially with everything being online

I have one more quick comment about that, whenever I say to find someone at your same level, that doesn’t mean getting your 12-year-old cousin to like take pictures with your point and shoot camera. That means to find someone who is starting a business and you’ve seen some of their work and you know it is quality, and the resolution is high.

Creating a Pinterest board revolved around what you desire helps a lot. Give us photographers ideas and vision for what you want because we are not mind readers. If we don’t have direction in photoshoots like this specifically, it’s going to be harder to communicate your brand through your images.

Speaking of branding, how do you keep that in mind when you are taking photos?

Location is huge for branding photography because there are a million different areas you can be in to represent different brands. I would say like knowing the colors, knowing just like the editing style even. I know some photographers will change their editing style to match the brand that you’re going for. If it’s really bright and poppy, they’ll change the editing.

Also, creating a must-have shot list for your photographer. Even if it’s just 10 photos. For example, “I want a photo of me looking at my laptop looking down at the keyboard”.

A lot of times people don’t think about that in planning their shoots. Photographers thinking about the best composition in general.

Who chooses props and location?

Location first, I would say location is very, very important for photos because it’s literally the backdrop for every photo that you take. You can do multiple locations in a photoshoot and that’s great. At times it’s tricky with branding photography because a lot of times you think “let’s just pop into this really cute trendy coffee shop in Austin and we’ll just take photos and no one will care and we don’t need a permit and we need to pay anybody”. But, sometimes that’s the case. A lot of business owners who own coffee shops, actually require you to pay and for you to reserve kind of an area and for you to have a permit and a license and all this stuff. It can be a process, so just be aware of that when you are dreaming up ideas.

There are tons of free spaces or even finding a cheap Airbnb that is affordable, but it has cool different spaces so you can get super creative with having amazing indoor spaces for your photoshoots.

As far as props go, some brands just need pictures of you in a more natural element, because not everyone’s on their keyboard all day. You could be selling outdoor adventure gear or whatever. And so in that case, the options are endless. You go outside and take pictures everywhere. As far as props, the more the merrier. Literally, bring anything and everything that you could potentially post on an Instagram photo.

You always need these stock photos, but if you can use an original photo so you’re not having to go to Unsplash or buy stock photos, that’s way better. I did a photo shoot with a girl who was selling essential oils. It was one of my favorite shots. Afterward, I posted a picture on Unsplash of her dropping the perfect little droplet of essential oil into her hand. Now, that picture is literally everywhere because people who are selling oils need stock photos like that. That girl has a whole gallery full of pictures just like that, that are just different.

Do you have any other like tips of what clothing looks good on camera?

My advice is to just don’t blend in with your background. If you wear your colors for your branding, and if we’re going to an all-white coffee shop, maybe don’t wear all white shirt or dress or something, have something that pops a little bit. I would also say the biggest thing is just bringing little things that you can throw on, you can change real quick throughout the photoshoot. So in all your photos, you’re not in the same outfit. Even just bring a sweater to throw on or throw your hair up real quick or something just to have a little bit of a different look for, for your photos.

How do I make sure I get all the right shots for my website?

We talked about this a little bit, but whenever you’re building your Weeknight Website, use the roadmap lesson to write down what you envisioned your photos looking like how you want to tell your story.

Just write down stuff, even if it sounds silly because you’re writing down literally “hands-on keyboard”. You can brainstorm ideas or even go to other websites that you think are amazing and just take ideas from them. Really it’s planning the photos based on your goals for your website. Which that makes so much sense.

Where can people find you if they’re in the Austin area?

You can find us on Instagram (that’s where we’re most active) @ChristinandChris
And on our Weeknight Website: christinandchris.com

Filed Under: Biz Advice Tagged With:

How To Get More Traffic to Your Website (The Free Guide)

July 22, 2019 by Brittany 2 Comments

The internet is a weird place. You can find pictures of cake fails and dogs with fake human hands right next to ASMR and mukbang videos. You can find a community of people dedicated to photoshopping arms onto birds and best of all, Star Wars/Frozen crossover fan-fiction. The internet is a weird place because people decide what’s on the internet and people are weird. Amazing, but weird.

Round Animals GIF from Big GIFs

One of the weirdest parts about the internet is how much it mimics real life. For example. Did you know that the answer to “How do I drive traffic to my website” is eerily similar to “How do I get people to come to my sleepover.” Let me show you.

For example…

Your site is kind of like your internet house. Your web address is like your….. Address. And when we say ‘how do we drive traffic to our site’, we are kind of saying… how do I convince people to come to my house. Weird stuff, right? But it gets weirder. The advice for “how to get people to visit my site” and the advice for “how to get people to come to my sleepover” are eerily similar.

Let me show you…

Be Social.

IRL: Figure out who you want to invite. Where do they hang out and when are they normally there? This is your new hang out spot too. Do a little research, how do these potential friends dress and what do they talk about? If they are a sporty bunch, get yourself some activewear and show up with at least one hot take on an athlete that you think is overrated. If they are punks, wear some doc martins and be prepared to have a thought out opinion on whether you prefer The Ramones or Sex Pistols.

INTERNET: Once you know who your target audience is, you’ll need to do a little research into what platforms they use the most and what times they are most active on. This is now your preferred platform and you try to post when they are posting. Make sure your visual content is consistent with the culture you are trying to connect with. Make sure the content is engaging so that you can possibly inspire a conversation.

Get Their Info.

IRL: Once your friends have warmed up to you, get their contact information. That way you don’t always have to hunt them down in public or at school. Now you have a direct line to them that will help you communicate with them quickly and directly.

INTERNET: Get their emails. Do not underestimate how important a mailing list is. If someone has signed up for your list it means that they are interested in what you have to say. It’s the perfect way to communicate with your audience without having to pay for ads and navigate through the ever-changing algorithms. A good email is an ideal way to tell your audience about a new blog or a sale.

Better Copy and Headlines.

IRL: Every good party needs a good invitation. You’ll need to make one that clearly gives all the right information while also enticing people to show up. This is an art because you have to be both clear and fun. If you do well, every time they see the invite they will be reminded of how much they want to attend. If you do poorly, every time they see it they will only be reminded of how lame they think it will be.

INTERNET. Good headlines are everything. It doesn’t matter how good the rest of your content is, if the headlines are bad then they won’t see anything else. Here are a few quick tips for writing great headlines.
People are more interested when you are talking about them. Use “you” as often as possible.
Being clear is better than being clever.
If your headline is longer than six words, remember people only pay attention to the first three and last three words of a headline.
Make sure you are speaking their language.

Keep Them Engaged.

IRL. Once you’ve gotten them to the party, you need to make sure it’s good. You want them coming back next weekend. Maybe have scary movies and popcorn. Maybe put rootbeer in your water guns and try to shoot it into each other’s mouths. I don’t know. Whatever your weirdo friends are into. Also, if you’ve got some inside jokes, leaning into those.

Michael Scott The Office GIF from Michaelscott GIFs

INTERNET: Make sure that your content is engaging and relevant to your audience. Whenever possible, link your content to other relevant posts on your site. You want them to stay on your site as long as possible. This helps them identify with your voice and it keeps them coming back to you when they need more input.

PRO TIP: Get an Email list.

Don’t underestimate how valuable an email list can be. This is how you keep in touch with your audience directly without having to battle any kind of algorithm. This is how you let people know you have new blogs/deals/etc.

Filed Under: Biz Advice Tagged With:

Mindset Shifts to Stay Consistent

July 18, 2019 by Brittany 1 Comment

I wanted to talk about something that I think, will help all of our users become more productive online.  I know a lot of people who use Weeknight Website are multi-passionate and really creative people. I’m like that myself and it’s really hard to choose a project and then stick with it. Sometimes the idea of needing to stick with something keeps us from starting it at all. It just intimidates us and makes us fearful to do things like a blog, social media platform, or even things for our personal care.

So, I want to talk about the mindset changes it takes to be consistent because this is just as important to building your personal brand as anything else. There is a podcast we listen to and the host would say “consistency breeds legitimacy”. The more that you show up, even if you know no one’s watching (or very few people are watching), the more that it helps you look legitimate in your business and it helps people trust you.


Mindset Shift: Responsibility is NOT a Prison.

Responsibility is not a prison. Discipline actually brings freedom. I know for a lot of people, the motivation for having an online business, it’s to create freedom in your life.

You may want more time for family, the creative things that you love, or even time for your passions. You know, a lot of you guys will try to work for yourselves or work towards a goal of working for yourself online. Those freedom goals can make you more resistant to discipline. Here is the trick, you actually need to be really disciplined to be able to create freedom in your life. What I’m learning in my life is when I just put my head in the sand and ignore things, I’m just preparing myself for a big blow up in my face later. It bites me in the butt later and the people that I am serving can see it too.

This is just me being vulnerable. I’ve let things slide, or not been disciplined in some areas and I kick myself later. I think to myself “Oh man, I really wish that I was done because I would have had more freedom in my life now.”

Benefits of Consistency

  1. Consistency grows, your influence. When you’re consistent,  people trust you and it helps them, in turn, buy from you because they know you’re showing up no matter what.
  2. People respect you and take you seriously because you’re taking yourself seriously.
  3. It eliminates decision fatigue. For instance, I know every week we’re going to be here on Friday with a webinar, so I don’t have to think about what are we doing this week to connect with our community. Another great example of consistency eliminating decision fatigue is a capsule wardrobe. At first, it seems creatively stifling, but then within that limitation find many different ways to express yourself. Ultimately, it helps you be able to roll out of bed and just pick something because all of your clothes go together.
  4. You get better… faster. I love this. The more that you’re consistently using one tool or a set of tools and mastering it, the more that you are going to get better and then you get faster.
  5. You create a body of work to fall back on.
  6. Consistency helps people trust you AND what you create.

Action Steps to help you improve consistency

I really recommend evaluating yourself by asking these questions:

  • Do I have this belief?
  • Am I actually being resistant to things that will ultimately help me later?


Mantras to help you improve consistency:

1. It will happen, but it doesn’t need to happen all at once. It is important to actually define your season and think about the fact that you are not a machine. You might be able to do all the things, but what’s the priority right now? I recommend writing down all of your goals and putting them into categories. Separate them into ‘now’, ‘next’, and ‘later’ categories. You have to decide what season is each goal and what do you have the capacity for right now?

2. You can do anything but you can’t do everything. In designing your season have to define your priorities. I recommend picking one thing to master and be consistent. One thing at a time. The absolute biggest mistake I see people make in online business is they’re doing all the things at once. When you’re doing all the things at once, you’re setting yourself up to fail.


3. Success is just showing up. I want you to remember that with consistency, success is showing up. All it takes to be consistent is to show up. All you have to do is show up at a certain time or on a certain day with a defined goal for yourself. Define for yourself… “What is success?” and “What does it mean to show up?”

Pro Tip: Use your content in a way that can be pre purposed. For example, take a video webinar and make a blog from it, then use the slides for social posts, and then use the audio as a podcast.

Need more help with this? Check out our Weeknight Website members-only video in your dashboard called “website mindset”!

Filed Under: Biz Advice Tagged With:

The best free pdf creator + how to make your own freebie!

July 8, 2019 by Brittany 1 Comment

Now that you have a website and you want to sell products or services online you need an audience to talk to. The only problem is how do you get people to let you into their inbox without looking like spammy Sammy?

This lesson will help you decide on what type of freebie to offer, how to use the BEST free PDF creator on the internet to make it, and how to put it on your WordPress website.

See Our Favorite Free PDF Creator in Action Below:

Step 1: Create your download

Remember that your PDF should provide value for your reader and lead them on a buying journey. The whole point of the PDF is to get them used to your voice and hearing from you as a trusted source of information. Make sure your download always…

  • Relevant to your audience (on the topic you talk about on your website)
  • Meets a need
  • Begins the buying journey

Step 2: Use Canva.com

Honestly, if you do not know about Canva, get ready to be thrilled! Canva is an easy-to-use design tool that will help you create a professional-looking design in just a few clicks. Canva is completely free and can help you make everything from Facebook post graphics to full PDF downloads like we are doing today.

This is one part of the video I can not explain in the blog so to see the full walkthrough of how to use Canva to create a PDF and see my finished version, you can watch the tutorial above from minute 5:03.

Step 3: Add The Download to Your Website

This is where I see you all glazing over and forgetting all the internet tricks you know. Please do not feel intimidated about this part. To get my PDF on my website, I upload it to dropbox.com (or even Google Drive). Then you want to share the link with your audience so click “Share”. Then simply add the link to a button on your thank you page and you are all set.

If you want to get fancy with this step (and you are using Dropbox) change the last number in your link from a “0” to a “1” and it will make the link an auto-download link.

Step 4: Make the Sale

Remember when we talked about starting your audience on a buying journey with your free PDF, keep that in mind. On the last page put a small bio about you, and add a link to your product, service, coaching, or offer. Let them know what the next step in the process is and they will thank you for helping them in their journey! This makes for a really fantastic buying experience with tons of help for your readers along the way. At the end of the day, everything we do should add value to our audience. See my last page for my PDF below to see an example of what you can do, below!

Need help creating content for your site? Check out our Content Marketing 101 Series! 

Filed Under: Biz Advice Tagged With:

How to Use Pinterest For Business

July 2, 2019 by Brittany 1 Comment

We are all about helping you get your original and world-changing content out on the web. Today, we are talking all things Pinterest for Business for promotion of your awesome blogs and website content!

If you’ve been following along with our Content Marketing series (via our weekly webinar), you know we have been covering topics on content marketing basics. This includes topics such as

  • How to do keyword research for free
  • How to write a wonderful blog post
  • How to launch your own podcast
  • And how to grow your email list

We actually have freebies for most those things to help you get started FAST! So if you haven’t grabbed them… what are you waiting for???

Fun Fact: You can get a free trial of our favorite Pinterest scheduling tool just by clicking this link > Get the Awesome Tool!

Watch the Pinterest for Business Replay!

\

Step #1: Create or Switch to a Business Account (0:00 to 3:04)

Now that you’ve launched yourself into the blogosphere, what do you do with your content? Here are our secrets for you on how you can actually use Pinterest for Business. We are going to think about Pinterest in terms of business today because that is how to handle social media even if you are a personal brand or musician. If you want to make money online and you want to actually get your content out into the world, think of yourself as a business and it’s going to go way better for you.

You always want to use Pinterest as a business account because it gives you access to so much more in terms of analytics, data, information, and things that are going to help you get your content seen.

If you don’t have a Pinterest for Business account already, visit this link > Get a Pinterest Business Account!

If you have a personal account you want to convert to a Business Pinterest account, you can convert your personal account. Below are the exact steps for how to convert your Pinterest account to a business account.

It is extremely easy to do, and later on in this post, I’m going to show you how to even make sure it’s linked to your WordPress website properly.


#2 Optimize Your Pinterest Profile (3:05 to

For this example, I used one of my brand new blogs that did not even have a Pinterest account until yesterday because it launched just a couple of weeks ago.

I only have like five or six blogs (NOTE: you don’t have to have like 25 blogs to launch) Below are some of the essential places that you need to add keywords to your Pinterest for Business profile.

Make sure you add keywords to:

  • Your profile name
  • Your profile URL
  • Your description
  • On your featured board

So where are all of those places? I’m glad you asked. Below are the screenshots of where those spots are. If you want to watch that in the tutorial, just click here! 

Lastly, you want to change your profile image and make sure it’s your logo or that it’s a really good headshot of you personally. Tip: People connect with people.

So you might be thinking, “I need a little bit of help with this step. How do I know what keywords to use??” We got you. This is where you’re going to use the keyword research blog we posted a few weeks back. ????#solved

This is your first step on everything on your website, blogging content, pages, and your landing pages should be keyword optimized and on your Pinterest profile. Pinterest operates as a visual search engine, not a social network. If you think of Pinterest in terms of a search engine (like Google), it changes your perception of how you put your content on Pinterest.


Step #3 Claim Your Website

Now we’ve got our profile all set up we’re going to go ahead and claim our website. This is again, one of those business features that you only get access to when you have a Pinterest for business profile.

Okay, so how do you even go about claiming your website? Well, back in that profile settings page that we were just on in step 2, we are going to click the button labeled “claim”.

Now, once you click on that button, you’re gonna see this little pop-up.

Select add HTML tag. NO FREAKING OUT… It’s super easy, okay? ????

Now, you’re going to copy the information in the window

Open your WordPress website in a new window

Navigate to “appearance” on the left-hand side and click on “customize”.


Once you click customize, it’s going to open a completely new window.  This window is the settings for your theme.

Once that window opens, click on “code”.

Then select Head Code (Do not confuse with “Header Code”)

Paste in the code from Your Pinterest business account that we copied earlier and then click “publish”

Navigate back to Pinterest and select the submit button to tell Pinterest to go check for your website information. If you followed the steps correctly, you will see your website verified in less than 24 hours!


Now your, your website is verified and it’s going to show up on your profile. This means nobody will be able to take your website and claim your content as their own.


Step #4 Add Pins to your Account

I already hear you asking “How do I put my content on my Pinterest account from my website?” and “How do I get my blogs from my website posted to Pinterest? it’s really simple!

navigate to your Pinterest account and then click the button in the upper right-hand corner labeled “add pin”. I know. So easy, right?


Now, there are a few steps here that I want you guys to be aware of.

The first thing you’re going to do is on this left-hand side of the pop-up window, is add your image.

Now Add a title, description and the URL of your blog post… Again, we want keywords. Below is an example of this all filled in properly for you!

When writing your Pinterest description include answers to these questions if you can:

  • Why should somebody click on this article?
  • What’s important about your topic?
  • Why do you have better information than the next guy?

Note: Pinterest has started implementing some hashtag search features, but it is not as popular on this network as it is on Instagram or Facebook. Moral of the story,  use them sparingly.

Now all you need to do is click publish!

#5 Schedule Pinterest for Business Pins

Right now, I personally schedule my pins in advance. All right, now a lot of people are going to ask and I can hear it now, “How do you even do that?” and “How many do you schedule?” and “When do you schedule them for?”

Well, this is where my favorite tool called Tailwind comes in. It’s amazing. You can schedule as much content as you want and it’s so easy it takes less than 5 minutes to schedule for a month. Right now I have about 620 pins in my queue. ????

How to Use Pinterest for Business Key Takeaway! 


It is content, content, and more content. That is what makes the Internet world spin, okay? So, if you want to master Pinterest for Business, churn out that content. Just make sure it’s high quality, okay? Don’t just put it out for the sake of putting it out. Put out high quality, really valuable content. People are going to love you for it.


See our whole content marketing series here! 

Filed Under: Biz Advice Tagged With:

How to Write a Blog Post (+ FREE Blog Post Template)

June 26, 2019 by Brittany 1 Comment

*Updated May 2022*

So you have a website and you are ready to start blogging, but the only problem is you don’t even know how to write a blog post… at least not the right way.

You know, writing a post the way that will help you get found on Google and send free traffic raining into your site? Yeah… learning how to write a blog post just got a little more complicated.

Well fear not bestie… you website BFF’s are here to save the day… and hook you up with a super sweet blog post template that will rock your socks for sure!

Watch the Video Replay on How to Write a Blog Post

How to write a blog post (step by step walkthrough and links)

Step 1: Research (1:43 to 4:52)

You can’t just dive in and start writing. You have to actually do some research. So how do you do that? Well, there’s this fabulous little tool on the internet. You might’ve heard about it. It’s called Google.

On my personal Google search window, I have a few little extra special goodies on the side. If you want to know about those and how to get them for yourself, check out my blog on how to do keyword research for free. I show you all thing things there and give some download for you there as well!

The first thing I did was typed in “how to write a blog post” for the research on this very post you are seeing. I noticed that the search volume is 5,400 per month and the competition is actually really low. On the right-hand column of my search results, while using my favorite keyword research tools, I see the related keyword “blog post template” with 2,900 people a month searching for that term. That’s where our idea for today’s freebie came from!

It’s amazing when you do a little bit of research, you can see what people are looking for, see what questions they’re asking on Google, see what related terms they might be searching for. That is going to provide a wealth of ideas for you and even inspire future topics for you.

The other place that I look is the top three to five posts for my keyword. These posts are going to be the ones that you really want to look over to see what kind of useful information they have in their post, and then go above and beyond what they have to provide more value to your reader. We will talk about how to do that below.

Get Help:

This step can be confusing for some people because they don’t know how to do keyword research. We wanted to help, so we have a full blog on how to do keyword research for free. We give you step by step information on how to do keyword research and get all the right search terms so that you are showing up number one on Google and sending free traffic to your website.

You’re welcome!
– your website BFF’s.

Step 2: Write an Outline (4:53 to 7:52)

This is heralding right on back to our middle school days when our teacher was up at the front and she’s like, okay, now we’re going to learn how to write an outline for your new essay. I don’t know about you, but 7th  grade was a few minutes ago for me, so let’s refresh ourselves on what an outline for what blogging should look like.

Some essential details that you always need to make sure that you include are:

  • Who needs this?
  • Why will this topic help them?
  • How does it apply to them?

Make sure you always have a clear idea of who you are talking to. Know what their pain points are, and the struggles they are facing. You want to make sure that your content is as relevant to your audience as possible. Remember: If you’re talking to everyone you’re talking to no one. Be as direct and specific as possible with your content.

Get Help: Check out our freebie on how to identify the right customer for your business and how to talk to them.

Step 3: Create an Offer (7:52 to 10:28)

You have, in the span of this post, already seen links to 3 different offers that we have for you. We didn’t create these overnight, they have been the product of months of conscious content crafting and research. So please, do not pressure yourself unnecessarily. Think about what will give your audience the help they need. As one of my favorite lines from the kid’s movie “Robots” says: “See a need fill a need”

  • A blog post template offer
  • A keyword research offer
  • A brand avatar offer

Free offers are really important, especially as you are starting out in blogging. These are going to bridge the gap between you and your audience, while also bridging the gap between your audience and their solution. If you build them a bridge to help them get to their ideal solution, they are going to trust you and become lifelong fans. You want to build that trust relationship early with your reads by meeting their needs and providing them the solutions they need to be successful.

Now I want to de-stigmatize this a little bit because we can tend to overthink this step. Below are 3 different offer types we use and love at Weeknight Website

1. The simple subscribe form: a simple little opt-in box to capture emails and leads to an email nurture sequence to meet your reader’s needs.

2. The designed form: These are really simple to do using Weeknight Website and can show off your freebies to your audience to entice more subscribers

3. The landing page offer form: really simple and clean templates for one page that will feature your product or offer in an easily consumable way.

Step 4: Add the post to WordPress (10:28 to 14:19)

This is the FUN and EASY part, I promise. All you’re going to do is log into your Weeknight Website dashboard (or your WordPress Site) and go to the left-hand column. Mouseover “posts”, and click on “add new”.

Once you click on add new, this window is going to pop up.

Add your blog post title first with your keywords from step 1.

Then, to add the text of your posts, click in the editor and just start writing.

OR, if you need a little bit of extra help…

Once you put your email in, it is going to redirect you to a window that’s going to say “download the template”. All you have to do is click that button and it will automatically download to your computer.

Once that text file is downloaded, copy everything in that text file window. The go back to the WordPress blog post that we already started and click on the text window of the editor. Then paste the code into the window and when you click visual again it will automatically show you a well-outlined post.

Step 5: Add value to the reader (]14:19 to 15:33)

As you’re putting your content, make sure that you are providing more value to the reader. What does that look like? Your blog should solve a problem for your readers. Take time and show them something that you’ve learned. You can even give them insight into your life. Try to always teach your readers something new. Blogging is all about telling the story of your life and connecting with your reader so that they either a feel inspired to get out and live their dreams or empowered to do the thing that they’re dreaming about. Do this in every post you write, and I swear you will gain readership so fast it’ll make your head spin.

Step 6: Use Yoast SEO (15:33 to 18:23)

If you have a Weeknight Website, this is already pre-installed for you. We did all the hard work and made sure you had the best of the best plugins. If you don’t have Weeknight Website, but you do have a WordPress blog, you can go ahead and download the Yoast SEO tool in the plugins store.

Once you have the Yoast SEO plugin installed, you’re going to scroll down to the bottom of your post, and we are going to go through all of these little sections.

1. Add your focus key phrase: For this example, we used “how to write a blog post”.

2. SEO analysis section: go through all of the little things with red lights next to them. You’ll notice that there is actually a link to an article from Yoast SEO on how to do each thing so if you get stuck click those links and read up on how to do that properly.

3. Evaluate your snippet: make sure that your URL looks good (remember when we stressed that we put our title in first? It is because we want to make sure that our link includes our keyword. Next, click “edit snippet” and you’ll add a little description about why people should read this blog post. Think of it as an ad… leave a little bit of enticement there for them to actually click over and read the blog.

4. Go through the readability analysis: Once your blog is completely finished being written, go back through and follow their recommendations for the content structure to make sure that your blog is reader-friendly. This will help you get really good readability scores from Google, which will help you rank higher.

Step 7: Add images (15:33 to 22:26)

Our goal with images is to add visual interest to the blogs. There are 2 places you can add images.

First, you can add media directly to your blog post body. This is going to go in the content of your blog posts. I encourage to upload your media and make sure that it’s compressed for speed, and that your images are beautiful. You don’t want anything grainy that’s like supposed to be 150 pixels and you blew it up to 350 pixels and it looks all grainy. That’s not going to do you any favors.

Tip: If you need a resource for really amazing free stock photography, we love unsplash.com it is super easy to use and very blog friendly.

Second, set your featured image. Make sure that you do this because every place that you have any kind of feature for blog posts, the image that you set as your “featured image” is going to show up there. Also, your featured image is going to be the one that Facebook automatically pulls when somebody shares your link for this blog post to Facebook, it is going to automatically pull that featured image.

Images should be:

  • Sized for social media
  • Used to keep content interesting
  • Clear and easy to see
  • Always add a featured image

This is visual content that you’re using to actually draw interest, so make sure that the images are complimentary of your blog topic and that they express an emotion that the reader might be feeling or that they want to feel. Give your reader a results-based image, not just always frustrated people at a computer screen. Provide visual cues on how the reader should feel when reading your blog. 

I want to just encourage, if you have not already had one, you need to get a photo shoot. It’s not as expensive as you think it is. Literally, you can get a business photo shoot for a couple of hundred dollars with a really great photographer and then you have all these beautiful high-resolution images to use on your site.

Step 8: Edit your posts (22:27 to 24:45)

I know this is everybody’s least favorite part of writing anything. I have my husband edit all of my blog posts before they go live because I just really don’t like editing, but if you have to do it yourself, here are some of my tips for you.

  1. Write on day one. Edit on day two. I always give myself a one day lead time on my blog posts because I want to go back and read it the next day and make sure that everything looks good, sounds good, and that the flow is correct.
  2. Read it out loud to yourself. I know, I know. Again with the middle school tips on how to edit, right? But when you read something out loud to yourself, it forces your brain to actually look at the words that are being used on the page in a different way. So, if you don’t have somebody to edit, make sure at very least that you read it out loud to yourself.
  3. Have someone help you edit: If you can, it’s always best to have somebody help you. Your brain will naturally skip over mistakes a lot of times because you’ve written the content, so it knows what you were trying to say. However, somebody else’s brain doesn’t know what you were trying to say so they will spot mistakes faster.
  4. Use Grammarly. It is a free extension that you can add to your web browser and it will help you immensely with your grammar. It’s been my lifesaver.
  5. Always edit twice. Do yourself a favor and give yourself permission to look over your stuff one last time before you hit that publish button.

Step 9: Go Live!!  ????

You are ready my friend, go ahead and push that pretty blue “publish” button and share your blog with the world! We believe in you!

Filed Under: Biz Advice Tagged With:

  • « Go to Previous Page
  • Go to page 1
  • Interim pages omitted …
  • Go to page 4
  • Go to page 5
  • Go to page 6
  • Go to page 7
  • Go to page 8
  • Go to page 9
  • Go to Next Page »
  • Privacy & Terms Of Use

A NetCrafted Company. All Rights Reserved.

Our website uses cookies and related technologies to improve functionality and performance.
Privacy Policy