

*Updated May 2022*
So you have a website and you are ready to start blogging, but the only problem is you don’t even know how to write a blog post… at least not the right way.
You know, writing a post the way that will help you get found on Google and send free traffic raining into your site? Yeah… learning how to write a blog post just got a little more complicated.
Well fear not bestie… you website BFF’s are here to save the day… and hook you up with a super sweet blog post template that will rock your socks for sure!
Watch the Video Replay on How to Write a Blog Post
How to write a blog post (step by step walkthrough and links)
Step 1: Research (1:43 to 4:52)
You can’t just dive in and start writing. You have to actually do some research. So how do you do that? Well, there’s this fabulous little tool on the internet. You might’ve heard about it. It’s called Google.
On my personal Google search window, I have a few little extra special goodies on the side. If you want to know about those and how to get them for yourself, check out my blog on how to do keyword research for free. I show you all thing things there and give some download for you there as well!
The first thing I did was typed in “how to write a blog post” for the research on this very post you are seeing. I noticed that the search volume is 5,400 per month and the competition is actually really low. On the right-hand column of my search results, while using my favorite keyword research tools, I see the related keyword “blog post template” with 2,900 people a month searching for that term. That’s where our idea for today’s freebie came from!
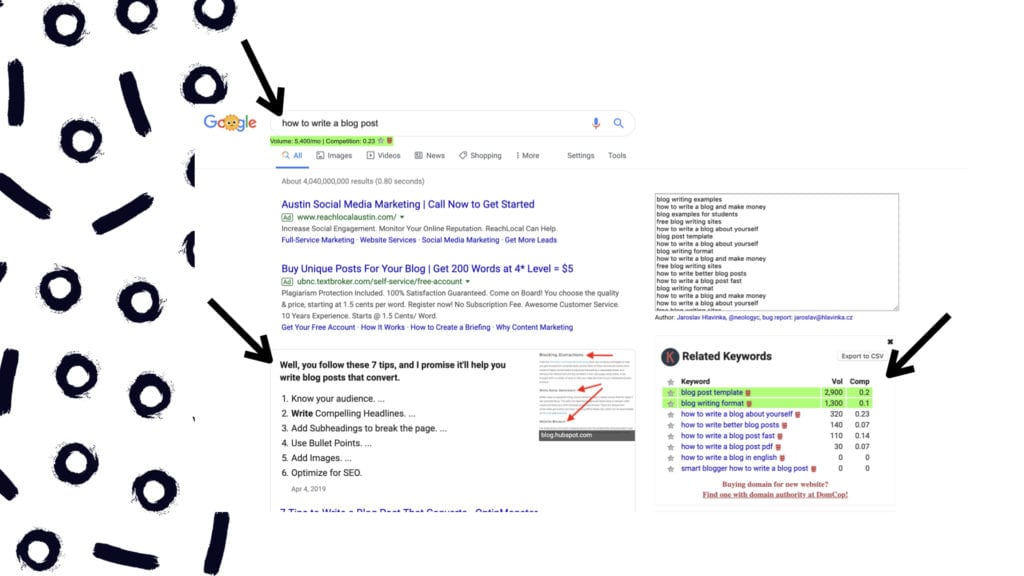
It’s amazing when you do a little bit of research, you can see what people are looking for, see what questions they’re asking on Google, see what related terms they might be searching for. That is going to provide a wealth of ideas for you and even inspire future topics for you.
The other place that I look is the top three to five posts for my keyword. These posts are going to be the ones that you really want to look over to see what kind of useful information they have in their post, and then go above and beyond what they have to provide more value to your reader. We will talk about how to do that below.
Get Help:
This step can be confusing for some people because they don’t know how to do keyword research. We wanted to help, so we have a full blog on how to do keyword research for free. We give you step by step information on how to do keyword research and get all the right search terms so that you are showing up number one on Google and sending free traffic to your website.
You’re welcome!
– your website BFF’s.
Step 2: Write an Outline (4:53 to 7:52)
This is heralding right on back to our middle school days when our teacher was up at the front and she’s like, okay, now we’re going to learn how to write an outline for your new essay. I don’t know about you, but 7th grade was a few minutes ago for me, so let’s refresh ourselves on what an outline for what blogging should look like.
Some essential details that you always need to make sure that you include are:
- Who needs this?
- Why will this topic help them?
- How does it apply to them?
Make sure you always have a clear idea of who you are talking to. Know what their pain points are, and the struggles they are facing. You want to make sure that your content is as relevant to your audience as possible. Remember: If you’re talking to everyone you’re talking to no one. Be as direct and specific as possible with your content.
Get Help: Check out our freebie on how to identify the right customer for your business and how to talk to them.
Step 3: Create an Offer (7:52 to 10:28)
You have, in the span of this post, already seen links to 3 different offers that we have for you. We didn’t create these overnight, they have been the product of months of conscious content crafting and research. So please, do not pressure yourself unnecessarily. Think about what will give your audience the help they need. As one of my favorite lines from the kid’s movie “Robots” says: “See a need fill a need”
- A blog post template offer
- A keyword research offer
- A brand avatar offer
Free offers are really important, especially as you are starting out in blogging. These are going to bridge the gap between you and your audience, while also bridging the gap between your audience and their solution. If you build them a bridge to help them get to their ideal solution, they are going to trust you and become lifelong fans. You want to build that trust relationship early with your reads by meeting their needs and providing them the solutions they need to be successful.
Now I want to de-stigmatize this a little bit because we can tend to overthink this step. Below are 3 different offer types we use and love at Weeknight Website
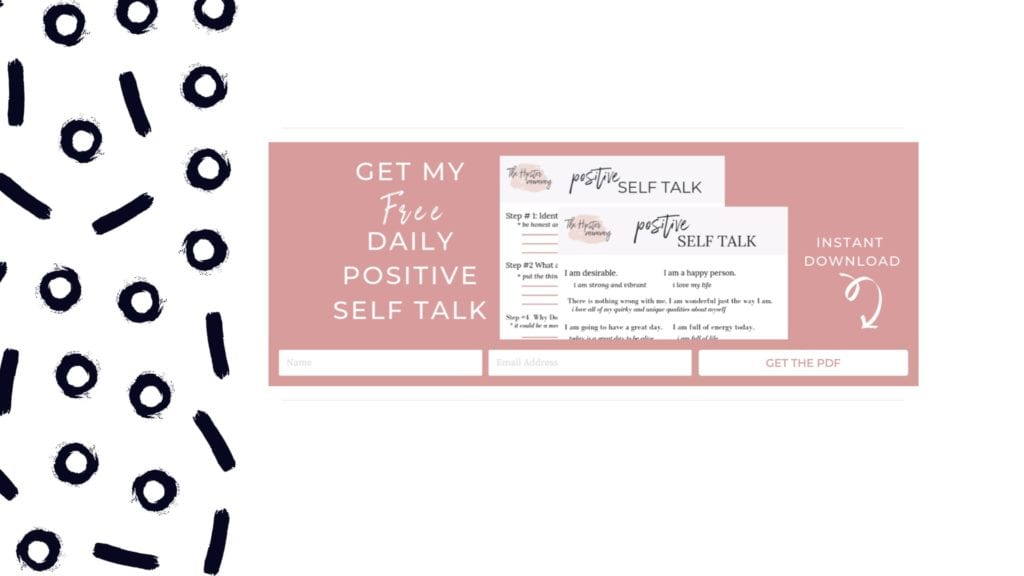
1. The simple subscribe form: a simple little opt-in box to capture emails and leads to an email nurture sequence to meet your reader’s needs.

2. The designed form: These are really simple to do using Weeknight Website and can show off your freebies to your audience to entice more subscribers
3. The landing page offer form: really simple and clean templates for one page that will feature your product or offer in an easily consumable way.

Step 4: Add the post to WordPress (10:28 to 14:19)
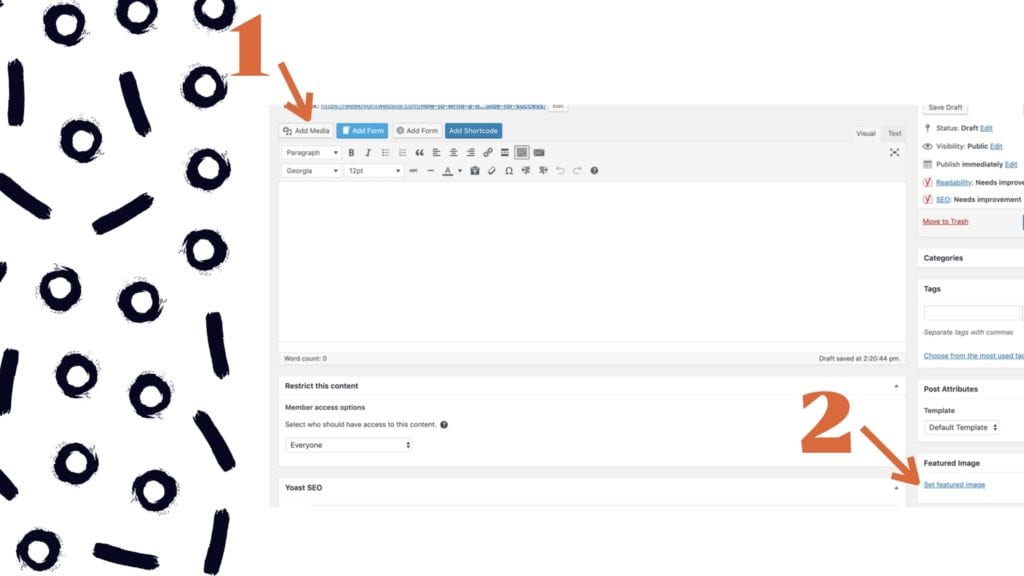
This is the FUN and EASY part, I promise. All you’re going to do is log into your Weeknight Website dashboard (or your WordPress Site) and go to the left-hand column. Mouseover “posts”, and click on “add new”.
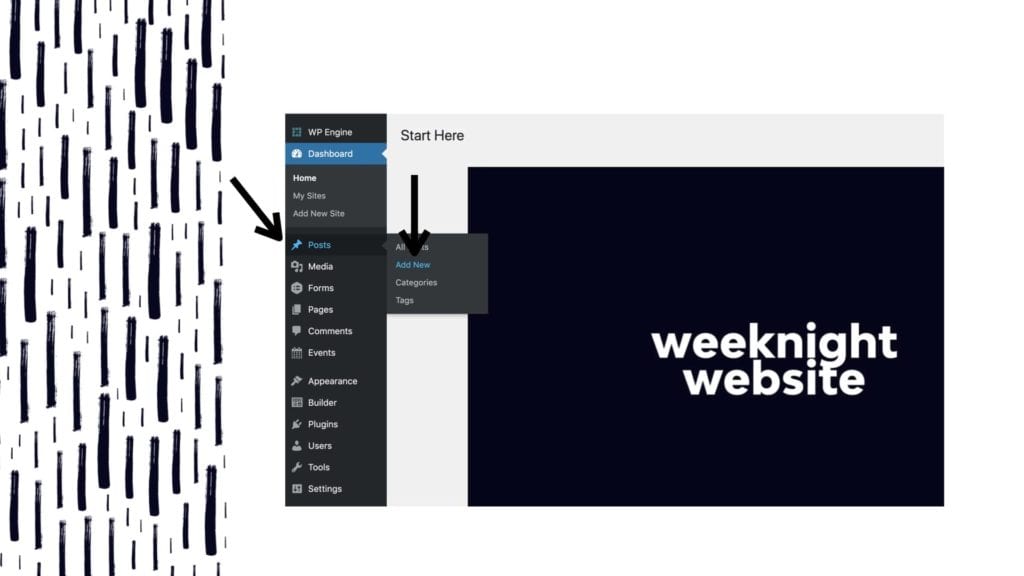
Once you click on add new, this window is going to pop up.
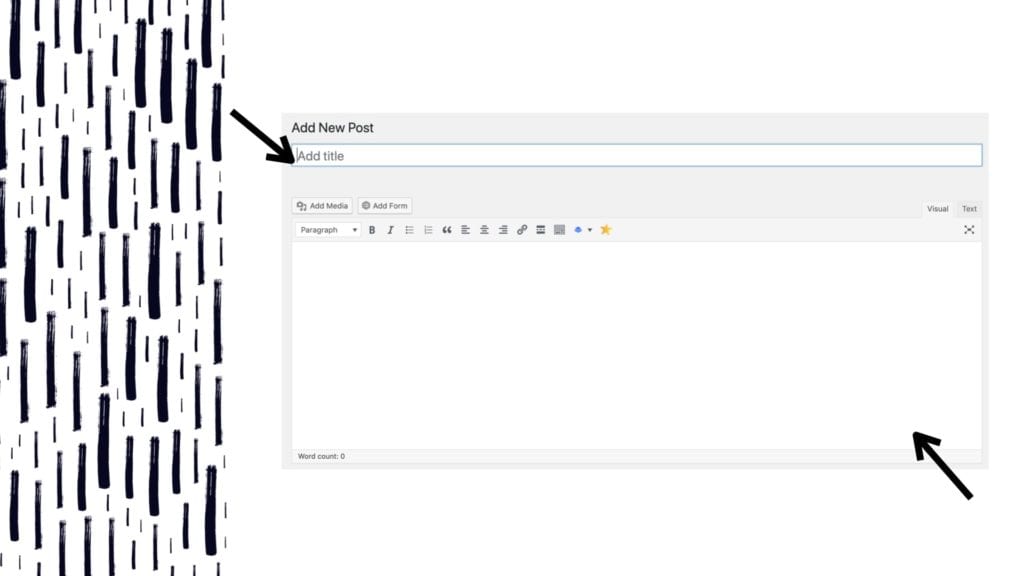
Add your blog post title first with your keywords from step 1.
Then, to add the text of your posts, click in the editor and just start writing.
OR, if you need a little bit of extra help…
Once you put your email in, it is going to redirect you to a window that’s going to say “download the template”. All you have to do is click that button and it will automatically download to your computer.
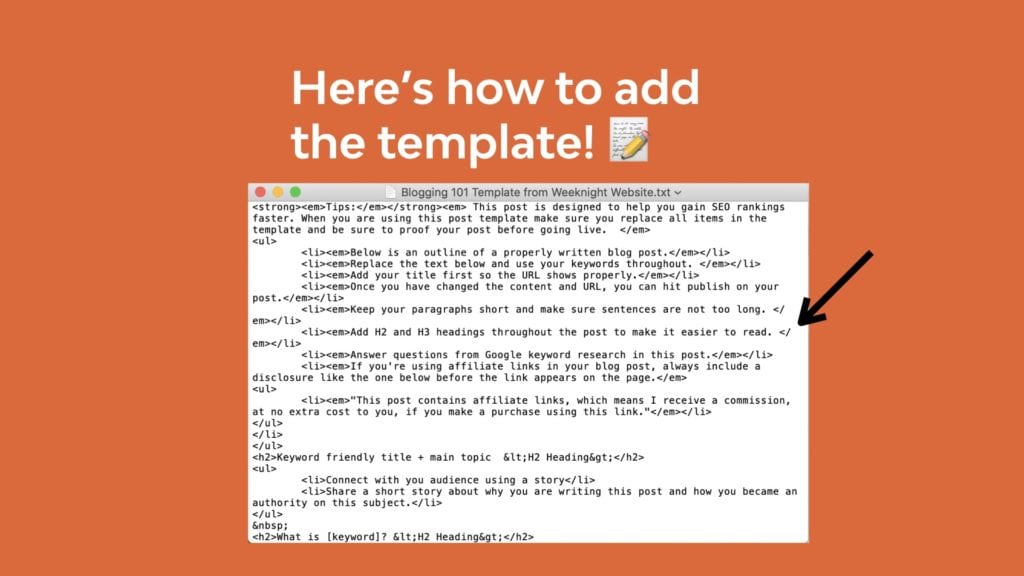
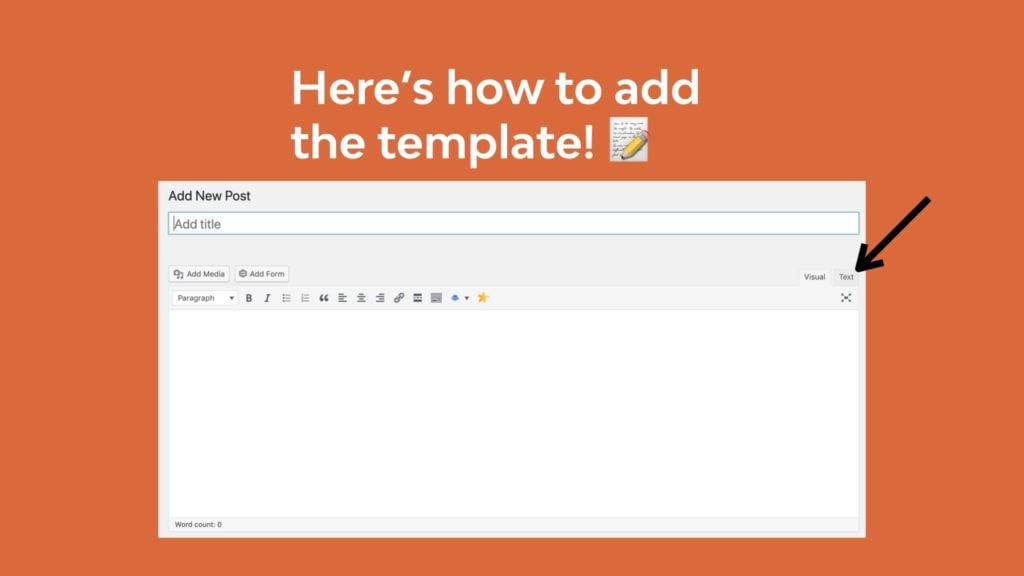
Once that text file is downloaded, copy everything in that text file window. The go back to the WordPress blog post that we already started and click on the text window of the editor. Then paste the code into the window and when you click visual again it will automatically show you a well-outlined post.
Step 5: Add value to the reader (]14:19 to 15:33)
As you’re putting your content, make sure that you are providing more value to the reader. What does that look like? Your blog should solve a problem for your readers. Take time and show them something that you’ve learned. You can even give them insight into your life. Try to always teach your readers something new. Blogging is all about telling the story of your life and connecting with your reader so that they either a feel inspired to get out and live their dreams or empowered to do the thing that they’re dreaming about. Do this in every post you write, and I swear you will gain readership so fast it’ll make your head spin.
Step 6: Use Yoast SEO (15:33 to 18:23)
If you have a Weeknight Website, this is already pre-installed for you. We did all the hard work and made sure you had the best of the best plugins. If you don’t have Weeknight Website, but you do have a WordPress blog, you can go ahead and download the Yoast SEO tool in the plugins store.
Once you have the Yoast SEO plugin installed, you’re going to scroll down to the bottom of your post, and we are going to go through all of these little sections.
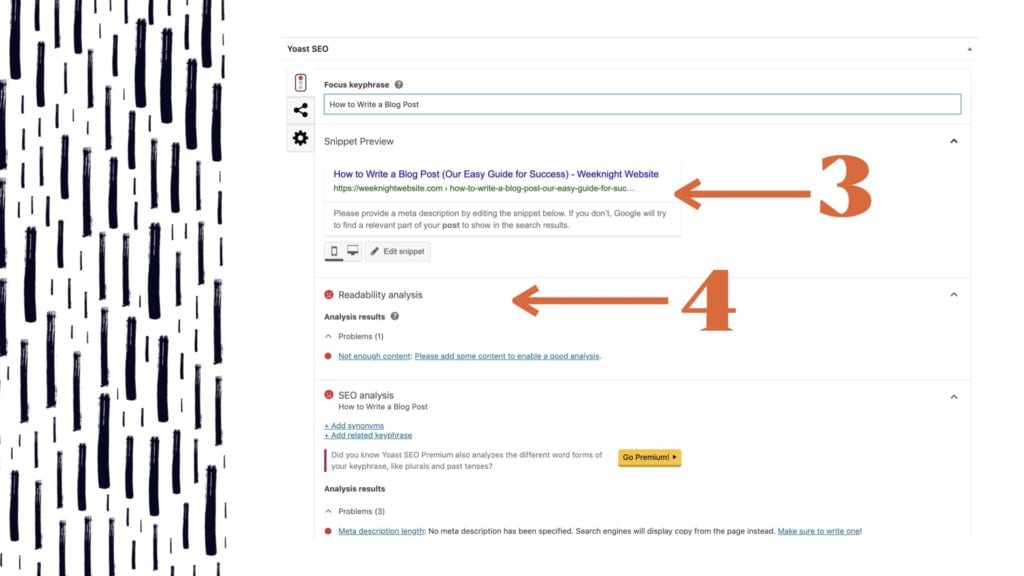
1. Add your focus key phrase: For this example, we used “how to write a blog post”.
2. SEO analysis section: go through all of the little things with red lights next to them. You’ll notice that there is actually a link to an article from Yoast SEO on how to do each thing so if you get stuck click those links and read up on how to do that properly.
3. Evaluate your snippet: make sure that your URL looks good (remember when we stressed that we put our title in first? It is because we want to make sure that our link includes our keyword. Next, click “edit snippet” and you’ll add a little description about why people should read this blog post. Think of it as an ad… leave a little bit of enticement there for them to actually click over and read the blog.
4. Go through the readability analysis: Once your blog is completely finished being written, go back through and follow their recommendations for the content structure to make sure that your blog is reader-friendly. This will help you get really good readability scores from Google, which will help you rank higher.
Step 7: Add images (15:33 to 22:26)
Our goal with images is to add visual interest to the blogs. There are 2 places you can add images.
First, you can add media directly to your blog post body. This is going to go in the content of your blog posts. I encourage to upload your media and make sure that it’s compressed for speed, and that your images are beautiful. You don’t want anything grainy that’s like supposed to be 150 pixels and you blew it up to 350 pixels and it looks all grainy. That’s not going to do you any favors.
Tip: If you need a resource for really amazing free stock photography, we love unsplash.com it is super easy to use and very blog friendly.
Second, set your featured image. Make sure that you do this because every place that you have any kind of feature for blog posts, the image that you set as your “featured image” is going to show up there. Also, your featured image is going to be the one that Facebook automatically pulls when somebody shares your link for this blog post to Facebook, it is going to automatically pull that featured image.
Images should be:
- Sized for social media
- Used to keep content interesting
- Clear and easy to see
- Always add a featured image
This is visual content that you’re using to actually draw interest, so make sure that the images are complimentary of your blog topic and that they express an emotion that the reader might be feeling or that they want to feel. Give your reader a results-based image, not just always frustrated people at a computer screen. Provide visual cues on how the reader should feel when reading your blog.
I want to just encourage, if you have not already had one, you need to get a photo shoot. It’s not as expensive as you think it is. Literally, you can get a business photo shoot for a couple of hundred dollars with a really great photographer and then you have all these beautiful high-resolution images to use on your site.

Step 8: Edit your posts (22:27 to 24:45)
I know this is everybody’s least favorite part of writing anything. I have my husband edit all of my blog posts before they go live because I just really don’t like editing, but if you have to do it yourself, here are some of my tips for you.
- Write on day one. Edit on day two. I always give myself a one day lead time on my blog posts because I want to go back and read it the next day and make sure that everything looks good, sounds good, and that the flow is correct.
- Read it out loud to yourself. I know, I know. Again with the middle school tips on how to edit, right? But when you read something out loud to yourself, it forces your brain to actually look at the words that are being used on the page in a different way. So, if you don’t have somebody to edit, make sure at very least that you read it out loud to yourself.
- Have someone help you edit: If you can, it’s always best to have somebody help you. Your brain will naturally skip over mistakes a lot of times because you’ve written the content, so it knows what you were trying to say. However, somebody else’s brain doesn’t know what you were trying to say so they will spot mistakes faster.
- Use Grammarly. It is a free extension that you can add to your web browser and it will help you immensely with your grammar. It’s been my lifesaver.
- Always edit twice. Do yourself a favor and give yourself permission to look over your stuff one last time before you hit that publish button.
Step 9: Go Live!! ????
You are ready my friend, go ahead and push that pretty blue “publish” button and share your blog with the world! We believe in you!