• Skip to main content
wwlogo-nm
  • blog
  • free stuff
  • for designers
    • explain weeknight
    • create client accounts
    • multiple site plans
    • tutorials
  • pricing
  • login
  • blog
  • free stuff
  • for designers
    • explain weeknight
    • create client accounts
    • multiple site plans
    • tutorials
  • pricing
  • login

Brittany

Shopify Has Come To Weeknight Website… Here is how it works!

September 1, 2020 by Brittany 1 Comment

Cue the confetti… 🎉 We are so excited to say that Weeknight Website now has an integration with the largest e-commerce platform, Shopify. Instead of looking for a Shopify WordPress theme, you can now have your cake and eat it too!

If you have ever tried to build a completely custom Shopify store with beautifully designed pages and custom layouts, you know you will quickly find that Shopify is not as user friendly as you hoped. Either you have to pay for an expensive theme and then learn to use it, or you are left bootstrapping your way to the site you imagined.

If you are ready to get working on a beautiful, custom (and easy to build) shop experience using the power of WordPress and Shopify, check out the video tutorial below.

Why is Shopify the right choice for your shop?

Shopify is the best. I (Kristen) have been a web designer for almost a decade and it seems that every client that has moved over to Shopify from other e-commerce platforms, their sales have doubled. I don’t know what magic it is. I think it’s the checkout experience, to be honest, but all of my clients who are serious about making money on their shop are all on Shopify.

We also love Shopify for eCommerce because it is an easier platform to use. Some of you may have tried other plugins like Woo Commerce for WordPress shops. What we have found is that to have the capabilities, to do everything that you really need to run a product-based business, even if it’s a digital product, you have to get all sorts of plugins from all over the internet to make it work.

We’ve also found, from our customers coming from Squarespace, that they didn’t really love their online store experience over at Squarespace because it was very limiting.

Over and over when people switch to Shopify, they have seen better sales.

Why do people not want to use Shopify sometimes?

In general, there are 2 reasons we see people shy away from using Shopify.

The first reason we hear a lot is the cost. The $30 a month price tag on top of having another website can be cost-prohibitive if you are just starting out. The Shopify Lite plan is a $9 a month shop option that is affordable and powerful. Good news, the Weeknight Website integration works perfectly with the Shopify Lite plan!

The second reason someone may not opt for Shopify is that building a page outside of your store on Shopify is not really that great of an experience. For instance, if you are trying to add additional pages to your site (ie. about page, or even custom blog layouts) you either have to buy a builder (which is not an intuitive option) or you will find yourself messing with the code and liquid files of the Shopify store. yikes! #dontsignmeup

With our Weeknight Website integration, you can keep the ability to build your product pages and your feeds from Shopify directly on your website. You also get the power of WordPress for blogging and content creation, meaning you only have to learn to use ONE software. Basically, if Weeknight Website and Shopify had a baby, this is what it would look like. That is winning!

Will my Shopify apps work with the integration?

If you have apps such as a print-on-demand app like Printful, Guten, Oberlo, or anything else through Shopify, yes weeknight Website’s Shopify integration work with those products. The same applies to all your digital products. If you have digital products on Shopify, we’ll totally work with those as well.

However, there are a few limitations. If you want to know more about those please refer to our training video for members only on setting up your integration. It’s really detailed and trust us, you aren’t missing much! 😉

We are so excited to see what awesome shops you all launch with the help of Shopify and Weeknight Website. If you are a member and need help with your Shopify switch, reach out to our support team and we will be happy to lend a hand!

When will the Shopify and Weeknight Website Integration launch?

Tuesday, September 1st, 2020. Hooray! You can get started using the app right away. Just make sure you follow the tutorials for setting up your information. If you are not already a Weeknight Website member you can sign up for a little as $16 a month and give it a whirl!

Give Weeknight a Try

Filed Under: Build Your Site Tagged With:

How to beat the summer haze and stay focused

August 18, 2020 by Brittany 1 Comment

Do you remember summer as a kid? Those lazy days running around with your friends outside playing, drinking lemonade, playing in the sprinkler, and blowing off all the responsibilities (i.e. chores) to run around the neighborhood and go to the pool.

via GIPHY

Unfortunately, as adults, we rarely get the summer pleasures that we enjoyed in our childhood. For most of us, it is life as usual, except hotter. (Much hotter if you live in Texas like us!) 

It’s like the sun comes out and I want to blow off work, go to the pool, and just relax. However, being my own boss means I am responsible for the outcomes of my client projects. #adulting

How can we be fair to ourselves (and have some fun) while keeping on top of work in the summertime? 

Let me share some of my tricks with you and hopefully, these will help keep you focused and motivated the rest of the summer so you can go into fall feeling like a total winner.

Want to watch this post instead? Take a peek…

Work in blocks 

I know this sounds silly but science shows that if you work in smaller chunks of time it will make you more productive overall.

By working this way you are training your brain to be highly efficient and output the best possible work in a short amount of time. One of the methods I have used to increase my productivity is the Pomodoro Technique.

The basic premise is to set a timer for 20 minutes and work on one singular focused task in that timeframe. When you do this you are allowing your brain to zone in on that one task, allowing it to be as efficient as possible. This method has done wonders for my personal productivity. I like to use the small 20 minute intervals as “batches of time” to knock out something that feels overwhelming or time-consuming.

Don’t Deprive Yourself

When we have a huge workload the temptation is always to try and sit down for longer periods of time to knock out bigger parts of the project. Unfortunately, this is exactly the opposite of how our brains work. Most people work more efficiently when they work on one task at a time, focused singularly on that thing.

Because of this, we often schedule large chunks of time where we don’t actually get to go out and do anything fun. My theory is that if we give ourselves rewards and goals we will be more likely to follow through with a rigid time schedule that will allow us more fun in our lives. 

By getting outside to walk your dog, playing Monopoly with your kid, hanging out with a friend that you haven’t seen in a long time, or just taking time to read that book that you’ve been saying you would read, you are giving yourself permission to live life while still adhering to client deadlines.

Doing this can also help with your motivation. When you only do one task without taking a break you will find yourself getting depressed when you don’t see the results as quickly as you want. Our brains get bored too and they need a break.

However, if you take a break and refresh your brain you’ll be more creative and more productive. This can also lead to you having a great experience in life and leaving yourself open for balance and a positive mindset that will help you accomplish more in the end.

PRO TIP: Setting boundaries around when you reply to requests or get on social media will go a long way to increasing focus and productivity. It is hard but so worth it. 

Choose your Big 3

This goes along with my tip in point #1. Basically, the premise is to pick the biggest 3 things that need your attention and tackle those 3 at the start of your day. I first learned about this method from a friend that had read the book “Eat That Frog”, which stated that anything that is difficult or something you are not looking forward to doing should be done in the morning. This is our most highly productive time of the day and it will help us to start off winning. This also allows your brain to remain focused on a task for a specific period of time until completion and when you are finished you feel more accomplished. 

The temptation here will be to choose 3 super unrealistic and lofty goals like “solve world hunger”. #beentherredonethat 😳

However, if you can break your big 3 down into something smaller like, “create a script for my promo video” or “plan my next sales email” not only will you actually get your big 3 done, but you will also be able to actually feel like a winner. 

Half of the battle you are going to face as an online entrepreneur is making time and space for creativity. If you get the hard stuff out of the way each day, you will find that creativity naturally flows from you and you will feel more productive and less behind the curve overall.  

PRO TIP: If you fall behind on a specific project, focus on that one project for a whole workday. Most of the time you can move that project to about 85% completion in a single day and give yourself a huge win.

Filed Under: Biz Advice Tagged With:

Sound like the tech expert that clients want

August 3, 2020 by Brittany Leave a Comment

Let’s face the facts. Tech scares people, especially clients. They get flustered at the idea of something breaking on their watch and not knowing how to actually fix it. Clients can be intimidated by the idea of losing out on valuable traffic and sales because of a website glitch they know nothing about. So how can we help them and increase our recurring revenue when we are new to website building OR when we are feeling overwhelmed by the idea of the tech ourselves?

We have the scoop right here for you, boo! Just sit back, relax, and watch this vid with all the deets you need to sound like a tech know-it-all, or you can breeze through the video notes below for a handy reference guide!

Check Out the Video Replay

Read the Webinar Notes 👇

We know what you are thinking… “BUT I’m a designer, not a techie!”

Sorry bout it, babe. Even if you are “JUST” a designer, you are seen as profesh in your industry, and your opinion is valuable to the clients. This does not mean that you have to know everything. For the most part, when a client asks a question, it will take some research time. Just like any job, you should be paid for that valuable information and research time you will need to do for your client. So whether you are researching a solution to a problem, looking into the latest tool or platform, or lending hard-earned knowledge of industry specifics, make sure your client knows that consultations are not free (and let them know your fee upfront).

Tips For HOW To Make a Good Recommendation:

#1 Ask good questions.

A lot of the time, clients will ask for your feedback about a specific platform or solution. Before giving them an answer, make sure you ask what their biggest pain point is currently, and what they are looking to solve. This will help increase your value to the client and help you find a solution that will move them toward their goals.

It’s important to build the skill of probing the client in order to get at the real issue so you can provide the best solution.

#2 Ask what the ideal outcome is for them.

Knowing what outcome your client is looking for is the best way to know if a tool or solution will work for them. Sometimes a new tool may not be the best thing because of the learning curve the software or system presents for them. There will be times when the tools they are using are good for them but the WAY they are using them can be changed to offer a better outcome.

When You Don’t Know:

#1 Be honest and say, “let me look into that for you.”

There is no shame in that game, my friend! Letting the client know that you are not willing to give them a half-baked recommendation lets them know you are thinking of them first. They also feel confident that you are not just pulling a “fake it till you make it” moment on them. There are times when we all have to own that we don’t always know everything all the time.

#2 Put on your research hat.

When you are researching something, make sure you look at the FAQ’s, knowledge bases, and user documentation. Sometimes you can even ask the sales team so that they can help you (they know their tool better than you do). The key is to know ALL your options. Remember, you aren’t committing to anything just by finding out all the options.

If you don’t know the exact verbiage to look for, start by talking with a sales expert. They can often give you the right language to efficiently search Google or other platforms.

PRO TIP: ANYONE CAN DO THIS!

#3 Play around with free trials!

Free trials are great for helping you assess the power of the tool you are looking into. Get in there and get your hands dirty. Pull your sleeves up and check things out. The tutorials and help documents can be a valuable resource for your learning experience as well.

It takes time and experience to know what you are looking for and to find the information and solution that will work best for people based on their specific business needs.

How to Present Solutions to Your Client:

#1 Give them a few options.

This is key to letting them know what their best options are. Let them know the limitations and advantages of each solution presented and how it can help them increase their business. However, make sure you don’t give them too many options. Offer 2-3 solutions and present them in a way that makes the decision-making process fast and easy for them.

#2 Tell ’em the cost involved.

I know you are immediately seeing the dollar signs, but the cost of something is not always monetary. Cost can often come down to the time spent making the project happen as a whole. Migration, training, fees for the new tool, your consulting fee, your help in getting the new tool up and running (if they want it): all of these things play a factor in the decision-making process. Some clients have time to spare, but funds are low. Other clients might have funds to get a project done, but their time is more limited. Be sensitive to that, and offer a solution with the monetary and time cost in mind.

Another key is to think long-term with costs and how their team can handle it. Sometimes something seems like it will be a cheaper solution, but it can cost you more in the long run if your client can’t use the tools and systems that you have set in place.

#3 Make a Loom Video

Loom.com is a great video hosting platform that is amazing for sharing videos with clients. Simply record your screen and share the options with them. It makes it easy for them to review it with their team and make the best decision for their workflow needs. Plus it’s waaayyyy easier than trying to type it all out in a document or email. 😉

Want to share Weeknight Website with your clients as a solution?

Check out our “Sell Weeknight Website To Your Clients” page. It has all the information on Weeknight Website you need to help your clients make an informed decision on their website hosting and building platform.

Sell Weeknight To Your Client

Filed Under: Biz Advice, Freelance Tips Tagged With:

How to create a killer promo video

July 21, 2020 by Brittany 1 Comment

So, you want to make a killer promo video for your website. We fully support that decision! Video is amazing for promoting your products and service, but it can also feel totally overwhelming if you have no idea where to start. How can you make video attainable and not feel like a HUGE project? Here are some of our best tips for how to get started making a killer promo video for your website – the fast-tracked way!

Want to watch our full webinar about this? Check it out👇

download the free video guide

First let’s talk about WHY you need video…

  • 1. Videos build trust: people can see you, hear your voice, and see you in action which gives you their trust more immediately. Seeing is believing!
  • 2. They help position you as an industry expert – this can send you leads or other press opportunities.
  • 3. You can showcase a product or service via video and let people see you or your product in ACTION!
  • 4. The emotional appeal and human connection of video will lead to a better relationship with a customer!
  • 5. Awareness/ Virality: Want to see your name in lights… on Youtube? Video is where it is at, and going viral is way easier with video!
  • 6. Videos can be informational (ie: a tutorial for future customers.) If you show them how to do something useful and helpful in their life or how to use your product, you will likely increase sales!
  • 6. Video can compliment or add credibility to another marketing campaign. Think about all the products you’ve purchased after webinars, 5-day challenges, or after seeing a customer review video!

What video does for your SEO

SEO (Search Engine Optimization) is how you get your website to show at the top of Google search results and drive free traffic. So if you want in on that action, you NEED to be using the power of video to drive people to your website. Because videos are considered “rich content” by Google, they will always help you rank better in search results.

Whether people realize it or not, they also use Youtube as a search engine. When they are looking for instructions on how to do something, they are looking for videos. When they are looking for the next greatest playlist, they head to YouTube.

So how do we get great videos?

The first decision to make when planning a promo video for your website or business is if you’re going to DIY-it or hire a professional. If you are working with someone else here are a few tips to help the relationship go really well:

The most important thing you need is a reference. References allow the person you are working with to complete your vision as you are seeing it instead of guessing all the time. If you want something just like your favorite Superbowl commercial, send your pro a link to what you’re talking about.

Which leads to the next most important thing you need to know, share your budget! We can often think playing our budget close to the vest will make us more likely to get a good deal. Let me just tell you now, it won’t. Your pro has a price point already and your budget won’t change that. Be upfront and let them know, they may have a package that will fit your needs or maybe they can refer you to someone else who can fit your budget.

If you are going to DIY this project we have a few recommendations for you as well. Make sure your gear is up to the challenge. We HIGHLY recommend renting a good DSLR camera for your shoot to get the most bang for your buck. There are usually video rental houses in every city and the staff there can usually make great recommendations if you tell them about your project.

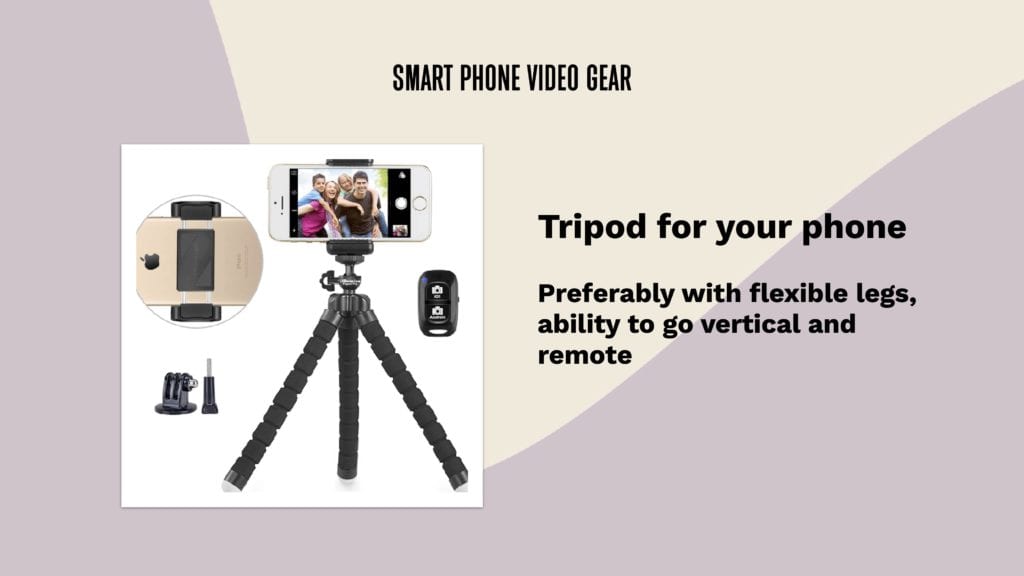
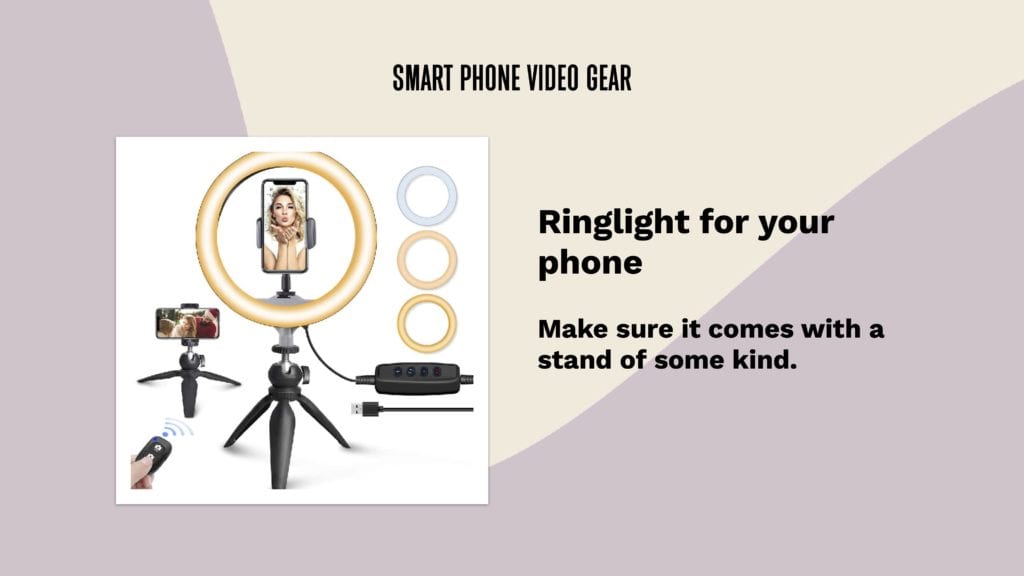
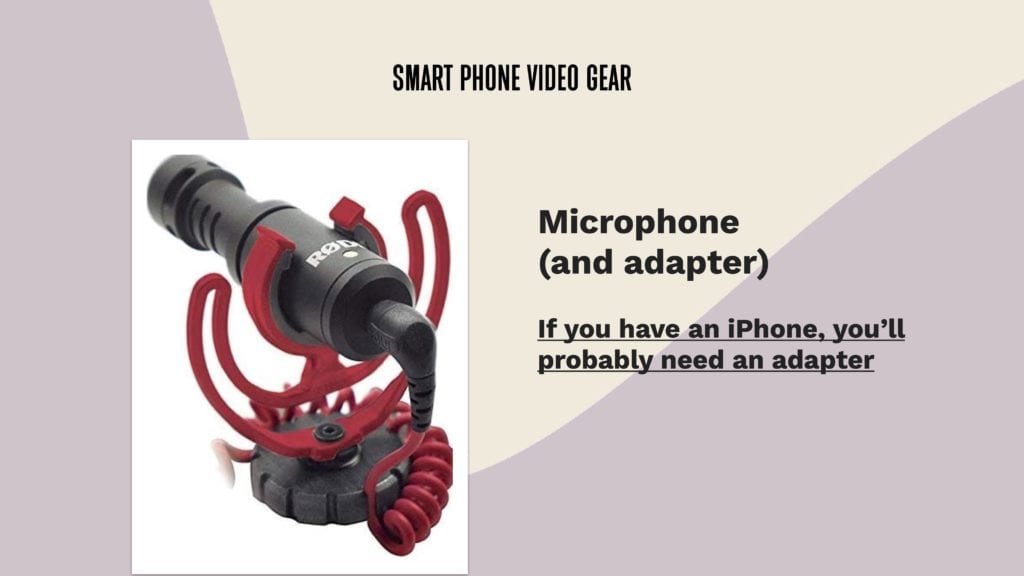
If you’re recording a video on your smartphone (no shame in that game!) some other equipment you may want to snag is a tripod, a ring light, and a microphone for your camera or phone. Here are the ones we use and love…

Planning your video

When you are planning your videos keep in mind that you NEED to grab the visitor’s attention within the first 10 seconds or they will stop watching (it’s science!) If you don’t grab their attention in that time frame you risk losing your audience altogether.

One way you can head this off? Make a script – maybe not something that you follow line by line but just something that will help you keep your talking points organized. We will talk more about this in the next point!

Be sure to think about B-Roll – aka other things you will cut to so you aren’t just a talking head. Images, stock video footage, and slides or graphics are really helpful to add visual interest.

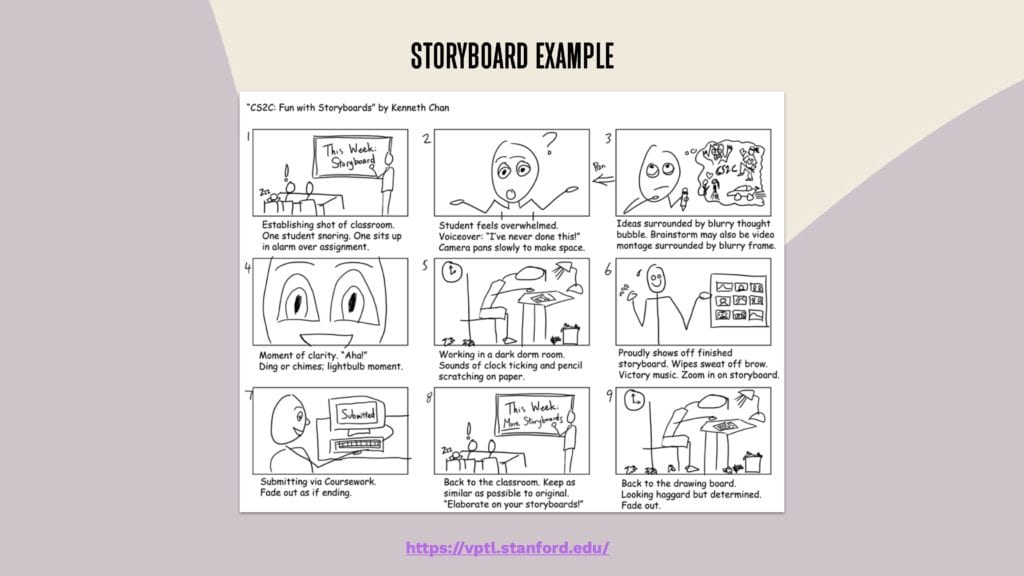
If it’s a product showcase video: might want to create a “Storyboard” for your shoot. How do you do that? You basically make a rough drawing and add descriptions of all the shots you will need to tell the story in your video. Take a look at the example below!

Script Formula

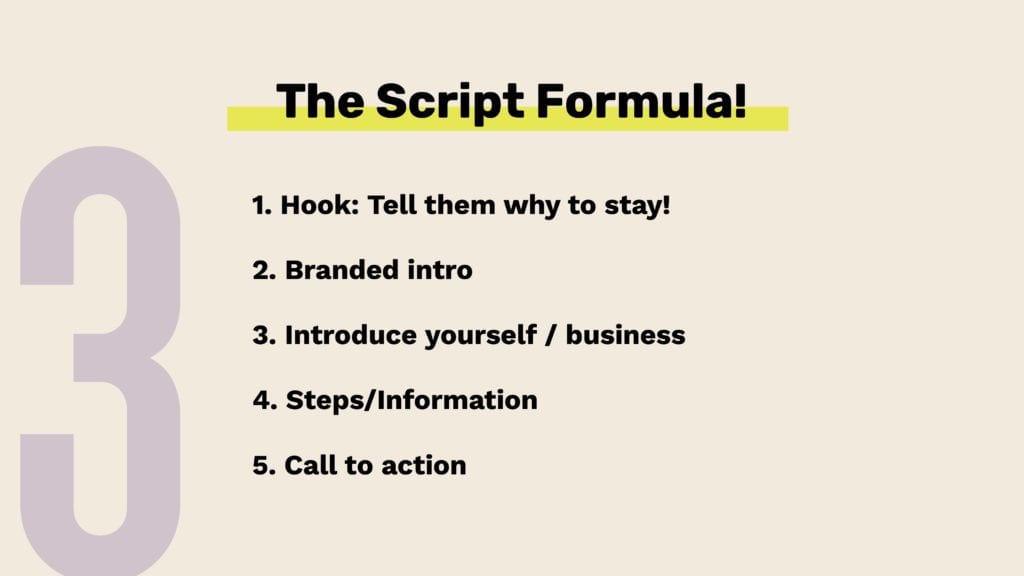
Now, when we say scripts we do not mean something you have to write out and memorize word for word. That can make the video world a lot more challenging and make you sound stiff. What we DO mean is to have an outline of your talking points in an easy to follow format that HOOKS the viewer, tells them who you are, and gives them the information they need to make the decision to buy! Follow the script formula below to make your promo video bullet proof!

download the free video guide

PRO TIP: When you flub while recording, don’t dismiss it thinking, “We can just edit that out later.” Taking the time to get a clean take of your point will save you tons of time editing later! In general, it is less time consuming (and less expensive) to fix all of these issues on set rather than having to spend all your time in editing trying to paste together a good shot.

Editing Like a Pro

There are a few valuable tips you need to know if you are editing your own videos. First, and most importantly, cut the fluff. You want to make your video as short as possible! Think of the average video length you watch. If it goes on forever you end up losing your audience and diluting the power of your message.

Some of the best DIY tools for the actual editing of your video are iMovie (if you have a Mac) or Adobe Premiere, the most professional option. There are also online video editors and apps too, like InShot.

If you want to make a branded video intro: VideoHive has cool templates you can use. Even Canva has “Youtube Video Ads” that you can customize to make a moving title slide. If you want to hire out the video intro part of your video, Fiverr “Youtube Intro” starts at just $15.

For background music: Audiojungle is a great source for royalty-free music. Make sure you don’t use anything you don’t have permissions to use! Your video could get taken down by Youtube or social media networks if you do.

After the Editing

Even once the video is done being edited you still have some work to do. One of the best things you can do for accessibility (making your content friendly for anyone searching and browsing on the internet, including hearing-impaired individuals) is to add captions to your video. This allows anyone who cannot listen to your video to still get the value from your content. You also want to make sure that you choose a great video thumbnail. This will help you get more clicks on your video and get people interested enough in your content to hang around and see what you have to say!

PRO TIP: Host your video on Youtube or Vimeo – not directly on your site! This will help keep your site speedy and fast and give you the double power of search rankings on the video outlet while also letting you claim the content and make your pages a rich and valuable resource for Google and your audience!

Final thoughts

The best advice we can give you is to KEEP GOING. Your first video will likely be your longest one to make but as you get in a good rhythm with it, you will find video gets easier and easier!

via GIPHY

download the free video guide

Filed Under: Biz Advice, Resources Tagged With:

How to Speed-up Your Web Design Process

June 23, 2020 by Brittany Leave a Comment

**Updated March 2022**

If you have ever built a website, you know that it can be time consuming. This especially applies when you are first learning to build a website or switching platforms. Website design is a lucrative business, and there is so much opportunity out there because everyone needs a website! However, website designers quickly find out that things can take longer than expected, and they can quickly cap out.

Surprisingly, the hardest part of building a website is making decisions.

If you are a designer, that’s literally your job – to continually make decisions on behalf of your client about their visual design elements.

If you are a business owner (trying to DIY your site), those same decisions can feel overwhelming and frustrating.

In light of this, we put together some ideas for you to make this decision-making process easier. 

1. Know your audience better than they know themselves!

The first thing I recommend is to figure out who your audience is. Even when you have a client, they may want you to design things based on their personal preferences, or you may be tempted to design based on your own personal preferences. However, when you’re working on a design project, you have to ask yourself, “Who is this actually for?” It may be for someone like you, but it may be for someone who is completely different from you.

So if you want the audience to really love what you do, you need to know who they are!

via GIPHY

In order to figure out who your audience is, you need to do your homework. If you want some parameters, check out our previous blog post on figuring out who your ideal audience is. There’s even a little free download with a worksheet that will help you figure out things like

  • Where are they shopping?
  • How old are they?
  • What’s their family structure?

For me, just knowing what stores my audience shops at helps inform my design decisions .

Fo example: If I know I’m talking to a dude who just loves going to sporting goods stores, I know he’s going to like a design that has more blues, greens, and browns and is more outdoor schemed versus my boss babe client who is on the internet most of the day and doing all of her shopping online.

I would approach the design for these two audiences completely differently. Don’t just assume you know who your audience is. Do your Research!

2. Gather Design References

Pinterest is our hero here! I never recommend that you copy other designers, but it’s good to look and see what’s visually interesting right now.

Go on Pinterest and type in “best web designs (year, niche, industry).”

It’s also a good idea to create a Pinterest board specifically for your project and pin at least 20 different references for the avatar you are targeting. This will help you find different fonts, colors, and ideas to help inform your design.

3. Make a Website Style Guide

The next thing you can do is make a brand board using Canva. They have brand board templates that you can use to bring everything together.

I would recommend adding four or five colors and two or three fonts. It doesn’t have to be anything fancy if you’re the only person referencing it. Don’t Skip This Step!

Note: If you are a designer, adding this as a service for a small fee or throwing it in for free is a super special touch and gives the “above and beyond” feeling to your work.

4. Roadmap it! 

You wouldn’t get in the car and just drive across country without a map. If you did, you might get lost or at very least waste a lot of time trying to get there.

Keep this step simple and just pull out a piece of paper and start writing everything you need on your pages.

If you are a Weeknight Website member, we have a free tool inside of our member’s only library you can use to help you plan the whole website.

Remember, this step doesn’t have to be pretty or fancy! Just grab a piece of paper and get mapping.

via GIPHY

5. Mock It Up

Once you have all of these steps completed, you’re ready to make a mockup. If you’re a web designer, you might have been taught on a tool like Adobe Photoshop because that was the industry standard for a really long time. While I still have it and use it, you may have an easier time with a tool like Adobe XD, Figma, Sketch, or Affinity Pro.

There’s no way to fast track great work. Right!? But maybe you want to to go more simplistic for the thing that you’re working on. Maybe it’s not worth it for you or your client to have some sort of opt-in page that isn’t really needed. Think about the amount of time you’re putting into a design versus the value of what you’re designing.

You have to look at things from the perspective of a business owner. What is the value of what you’re creating versus the time that you’re putting into it? 

BONUS TIP: Having the right tools saves you tons of time! Some tools that I recommend are:

  1. Envato Elements – Thousands of stock photos, fonts and web template.
  2. Flaticon – The largest database of free icons available.
  3. Unsplash – Free images and photos that you can download and use for any project.
  4. Sketch –  A design toolkit built to help you create your best work.
  5. Stocksy – Inspiring stock photos + videos driven by creative integrity.

6. Build the Skeleton

The goal in this step is to lay things out based on your roadmap really quickly. You can refine it later, but you do not have to go through every single little detail of every single little section. 

Your goal is to build the skeleton as quickly as possible, and then you can do a second and third pass until it’s perfect, but you’re going to feel like you’ve got something done and you have a lot more progress which will cause you to be much less likely to throw in the towel earlier. 

If there’s something you absolutely can’t figure out, I follow what I call the 30-minute rule. If something takes me more than 30 minutes to figure out, I stop. I either ask for help, or I will just sleep on it.  A lot of times even if I just take a break, when I come back, I figure it out very quickly. I highly encourage you, even if you’ve procrastinated and you don’t technically have time, you might want to just take a little break and give your brain some space to work that problem out.

via GIPHY

Ready for the next step in website design?

Use the Website Completion Kit to design, write AD build your website (or client site) in just 48- hours! This is the exact process both Kristen and Brittany used to build six-figure design agencies and also to make designing websites super streamlined and FUN!

See the Website Completion Kit

Filed Under: Build Your Site, Freelance Tips Tagged With:

How to take a personal day when you work for yourself

June 15, 2020 by Brittany 1 Comment

When it comes to your business, especially as a solopreneuer or freelancer it’s important to know how to communicate when you need a personal day. With the events in this first half of 2020, a lot of us are needing an unexpected day off here and there!

Sometimes, emergencies come up, and you can’t help the fact that you just need a personal day. We’re going to talk about what you can say when these things come up, but also what to do when you just need a vacation overall.

Personal Days Are Important

You don’t have to feel bad about taking one. PERIOD.

Most companies build personal days into their infrastructure. So you, as a freelancer, should build this into the way that you structure a year. Treat your company like an actual business and make sure you give yourself time OFF! You don’t have to feel guilt around this because personal days for fun things (or even for inspiration) are totally valid.

You need to stay fresh as a creative. It’s actually really important that as the only person driving your business forward you stay rested and inspired so you don’t get burnt out. Sometimes that means unplugging for a day.

How Do You Go About Taking a Personal Day?

Communicate with your clients

The first thing you have to do is actually communicate with your clients. You don’t need to explain yourself. You can literally say something as simple as, “Something came up that I need to attend to today.” Your health and mental well-being are totally valid as needs to attend to.

Make sure that you’re considerate of any other moving parts of the project you’re working on. Send some updated ETAs on whatever it is that you’re supposed to be delivering to your client and let them know you appreciate their patience. And overall – keep your schedule for the most part! You want to be known as reliable and dependable.

Here is a copy and paste script you can use!

Hello (Client Name),

I wanted to let you know that something has come up today and I need to take a personal day. I wanted to make you aware because (we had a meeting scheduled, our project has a deadline coming up, you were expecting ____ thing from me).

Our new (ETA on deliverables, meeting time, etc…) will be (fill in date).

Thank you for your patience. It is much appreciated.

You Might Need A vacation

If you have a personal day and then realize you are not feeling better, you might actually need a vacation. I want to clarify a vacation is different than a trip.

I used to think a vacation and a trip where the same thing. I actually went through a season of burnout and talked to another web designer who pointed out I was going on a lot of TRIPS but that trips were not vacations.

Rethink your vacations. A vacation is when you purposely unplug get away and actually change what you are doing. Some ideas for a “travel-light” vacation are to have a staycation, go camping, rent an Airbnb locally, or stay at a fancy resort and treat yourself to a spa day.

Basically, a vacation is just doing anything differently than what you normally do for a few days. Anything that shakes up your routine and feels like you can actually unplug is a vacation.

Some of you guys may feel like you don’t have a week to take off because time is money in your business. If you feel like taking a week off isn’t an option for you, let me just submit to you the idea that you can just take a long weekend. Usually, four or five days (Friday-Monday) is enough to get you going again. You might feel less stressed that way as well.

How do you get ready to take a day off?
Here are 3 things that I do every time I take a vacation…

Hire a business babysitter.

This is usually a virtual assistant or someone qualified to handle my business affairs. I’ll give them a couple of hundred dollars and tell them, “All I need you to do is watch my inbox and watch my website and make sure nothing goes down”.

The next thing to do is write a document for them with logins and information that they may need for managing things for clients while you are out. Give them the ability to contact support channels for your tools while you are out and let them know the parameters for contacting you if there really is an emergency. You have to create the systems for them to follow, and give them the authority to take action if something happens.

Prep Your Clients

Right now, I’m planning for a maternity leave that starts at the end of November and I’m already prepping clients. I am telling them now so they are aware anything they need help with needs to be in earlier than normal. I also help them by sending frequent reminders.

Set Up an Auto Responder

This is the thing I always forget to set up. An autoresponder is simple and lets clients know you are out of the office and when they can expect a reply from you. It helps manage expectation and it helps you rest at ease.

*Pro Tip: Make sure you set an away message on social media if you connect with clients that way as well!

Want to listen to this post instead? 👇
Check out our Facebook Live Video!

Filed Under: Biz Advice, Freelance Tips Tagged With:

  • « Go to Previous Page
  • Go to page 1
  • Go to page 2
  • Go to page 3
  • Go to page 4
  • Interim pages omitted …
  • Go to page 9
  • Go to Next Page »
  • Privacy & Terms Of Use

A NetCrafted Company. All Rights Reserved.

Our website uses cookies and related technologies to improve functionality and performance.
Privacy Policy