• Skip to main content
wwlogo-nm
  • blog
  • free stuff
  • for designers
    • explain weeknight
    • create client accounts
    • multiple site plans
    • tutorials
  • pricing
  • login
  • blog
  • free stuff
  • for designers
    • explain weeknight
    • create client accounts
    • multiple site plans
    • tutorials
  • pricing
  • login

Brittany

Beautiful Website Design Inspiration for your Next Project

June 12, 2019 by Brittany 1 Comment

If you’ve been working on your website design for any amount of time, you know that the hardest part of it is actually making decisions! We are devoting a whole post just to talking about our favorite ways to keep the website design inspiration alive as you build your website. One of the best things you can do for your website is to give yourself some time to get inspired!

If you want to watch the full video you can catch the replay below. ALTERNATIVELY, if you would rather read it, get our full website design inspiration process below in the blog post!

Warning:
As you watch this, do not go down the road of the comparison trap! It’s super easy to get caught up in this, but I beg of you, not to my friends!

Watch the website design inspiration webinar:

1. Create a Mood Board (1:50 to 3:51)

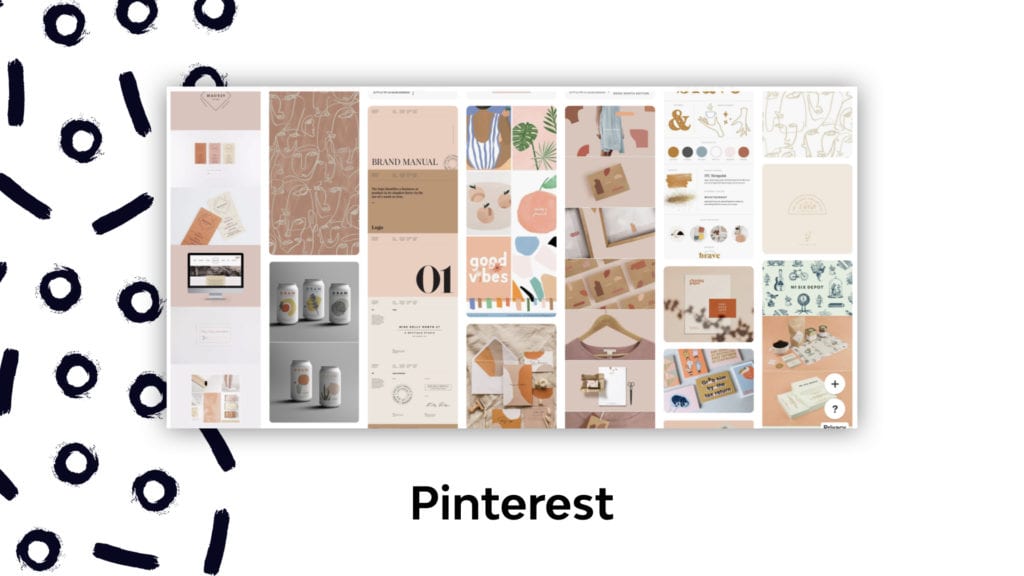
I am going to sound like a broken record here, but I will always tell you to make a Pinterest board. If you don’t like Pinterest, there are other tools that you can use to make mood boards. We’ll talk a little bit about offline inspiration as well, but I really recommend using a tool like Pinterest to actually pull references from around the Internet that you like. For example, there are other brands (maybe it’s totally unrelated to your niche or topic) that will inspire you and make you feel good when you see their website.

Whatever inspires you, I recommend pulling visual references from that brand and putting them in one place because eventually you’re going to see “visual vocabulary” in the similarities and what you like and it might actually surprise you.

On the screen below you can see a reference from a project I worked on recently where I pulled together things that reminded me of this client’s brand. Below is the board I came up with. You will notice there are many of the same colors on here. It’s really helpful, when you are looking for “website design inspiration”, to create a mood board. You can actually do this offline as well. Simply pull out pieces from magazines and books that inspire you and paste them together on poster board to get a feel or a mood.


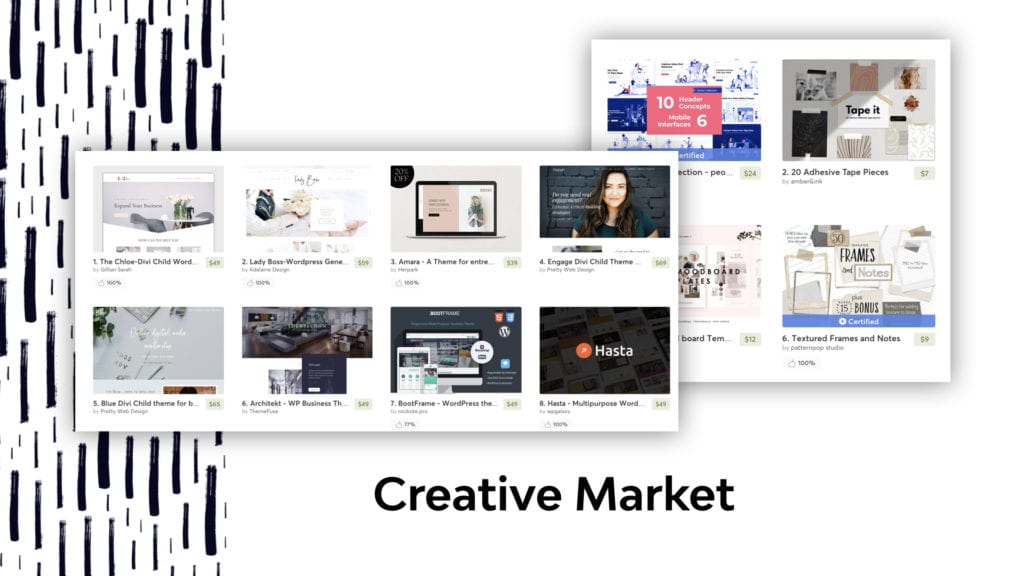
2. Find Inspiration on Design Resource Websites (3:52 to 6:10)

There are a great number of websites that designers use to grab assets from. If I was designing a banner for a website, for instance, I might go on a site like, Creative Market, and use it to help me pull banner assets and just get ideas for my design that might be cool. You can even look at the themes that designers have for sale on Creative Market.

Keep in mind, at Weeknight Website, we don’t use WordPress website themes. We help you create your own customized website however YOU want it, without a theme’s limitations. You can use the designer made themes to build something you love.

Let me be clear, I’m not telling you to copy frame for frame. However, it’s really helpful sometimes to look at what other people are doing, especially professional designers, and get an idea of the kinds of things that you like, as well as functionality that you didn’t even think about, or elements for your website that you didn’t even think about it.

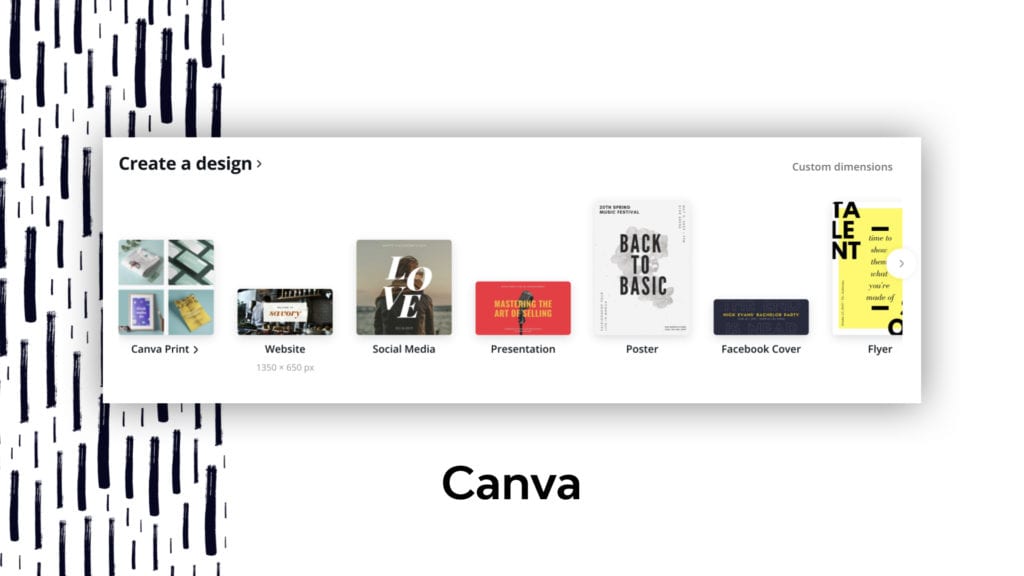
Canva is another fun designer resource, but it’s a lot more geared towards the DIY people. ???? Canva is really great for when you need website design inspiration for creating things like website banners because they have templates built-in.  They have some really cool designs (made by designers) for you to get inspiration from. I want to stress that Canva is an inspiration point, but not necessarily a great idea for creating your banners.

Check out our step by step website banner tutorial below!

Check out some of my personal inspo from these places below… 


3. How to Get Inspired (6:10 to 10:40)

So, how do you get inspired in the first place? Sometimes, especially if you’re in the throes of creating your website, (and speaking of throes), it just makes you want to throw your computer out the window. I think we’ve all been there, right? Creating a website (even as easy as we make it here at Weeknight Website) can take a lot of persistence. You have many decision points along the way. So, what I recommend is actually taking some time to get offline and get inspired.

Here are some questions you can use to unlock that brain of yours, so that you can make great decisions, and you can get inspired to do the next phase of your project:

1. What inspires you offline?

This is the number one question to unlock your brain. For me, when I need to get inspired again, I know window shopping will get me there. I love to go to a cool artsy boutique, smell beautiful things, touch fabric, sit on “poofy” furniture, and really take in the beauty of life’s creativity. So what inspires you offline? Is it going to a concert?  Sometimes it’s other artistry that might inspire you. Maybe it’s just hanging out with a friend, or even better, hanging out with a friend over coffee. So many times we just need someone to have a laugh with in order to pull us out of where we’re at when we get stuck.

2. What are other industries doing that is interesting?

Sometimes you might be finding that you’re not inspired because you’re seeing the same old, same old. In our current state of marketing, we need to be making content that doesn’t look like everybody else’s content. People are so overwhelmed by the number of things out there. Look outside of your industry a little bit. Maybe you’re an author and you’re just somehow inspired by what Adidas is doing with a campaign. Ask yourself, can I do something like that?

3. Wouldn’t it be cool if…

We actually have a site that was started with this idea of “wouldn’t it be cool if”. If you fill in the blank, you’re actually going to find a lot of fresh inspiration for what you need to do next in any area of your life. You really can use this question in any area of your life; but, if you need to be inspired, it’s really easy to say “this is not working”. However, I encourage you to unlock your brain to create something NEW that will work.


3. Design is not just how it looks it’s how it WORKS (10:41 to 14:52)

Steve Jobs said something very similar, but this is the method behind Apple. I love to use that idea in web design inspiration because a lot of times we ask ourselves what our leaders in our industry are doing, how are they organizing their websites? If you’ve been working on your website for any amount of time, you know that there is a large amount of figuring out “where does stuff go”. You begin to ask yourself, “How do I actually lay this out in a way that is going to lead people through a great journey on my website?” When you begin thinking this way you realize that it’s not just about the beauty of your site, it’s also about the flow.

So, what I like to do is look at other leaders, in the industry that I’m building a website for, and see what they are doing. Many times these leaders have marketing teams and they have almost unlimited design resources and they’re asking great questions and doing tests. They’re doing “AB tests”, they’re using all sorts of analytics behind the scenes and they’re seeing what’s working for our industry and our kind of business. They’re already doing that front work for you and investing their own money into it.

You’re also going to want to look at your Google Analytics and give yourself the gift of knowing your numbers on your website. This will help you be able to restructure your page in terms of what people are engaging with on your website.

If you want more guidance on how to structure your homepage, you can grab our “Perfect Homepage Cheat Sheet”. This is going to give you some great starting points for how to layout your website in a way that works.

Filed Under: Biz Advice, Build Your Site, Freelance Tips Tagged With:

How to Build an Email List (Tips to Get a Bigger List Now!)

June 4, 2019 by Brittany 1 Comment

So, you want to build an email list? That is such a great and powerful idea! It is one of the best and easiest ways to grow and monetize your online audience. Not only is it easier to do than you think, but it is also wonderful to have your audience to talk to in just a few quick moments.

Your email list is one of the ONLY forms of marketing that you own forever and can take with you through your career. So, let’s talk about the 7 simple tricks to build your list!

How to build an email list (super easy tips)

Tip #1 Think about who your list is for.

It’s always good to set up the heart of your intention for your emails. You need to think about who is reading them and what pain points they are dealing with. Always go back to your “brand avatar” and write for them. If you do not know who your brand avatar is, we have a free worksheet to help you figure that out!

Yes, I need the worksheet

Tip #2 Choose an email service provider

We like Mailchimp because it is free up to 2,000 subs! However, if you are looking for an easy-to-use, beautifully designed, email marketing system that is easy on the wallet, we LOVE Flodesk. It is hands down the best email design software on the market right now. Plus you can’t beat the pricing. Want to lock in the best pricing? Use our partner link and get a special discount!

Tip #3 Give them a reason to sign up.

What can you offer them that feels SO valuable, they would pay for it if it weren’t free? Examples are, free music downloads, a PDF, or a helpful workshop.

Tip #4 Create an opt-in page

One of the easiest things to do is to collect emails using an opt-in page with a simple design. There are tools and templates baked right into Weeknight Website to help you do this! Keep in mind that your “copy” is very important! A great headline can make or break your number of subscribers. If you need help choosing great keywords for your pages to help them be SEO friendly and be found on Google, see our keyword research blog from a couple of weeks back.

Teach Me Keyword Research

Pro tip: Have an image of your “freemium” and show it off as something tangible to your subscribers. They love seeing a tangible product!

Tip #6 Create a welcome sequence: remind them what they get on your list.

A Welcome sequence is a scheduled and automated way of keeping your list “warm” to you. They need a reminder of who you are and why they should listen to you.

Pro Tip: Make the subscribe form redirect to your freemium as the success page! This will help you build value and expertise BEFORE they even hit the inbox and see you there.

Tip #6 Schedule a time when you will regularly engage with your list.

We send emails weekly on Tuesday’s and we try really hard not to deviate from that. It takes a bit of focus and planning upfront but after you get the hang of it, you will find it comes much more naturally. Think of simple things you can ask or share with your friends. Think of it as emailing your real friends and it will be easier!

Tip #7 Never stop growing

Growing your list is super important so you can continue to increase sales and get new people interested in your offers. Here are some new ways you can point traffic to your list and see that growth you are looking for.

Easy email list growth ideas:

  • * Create contests and challenges
  • * Create a “pop-up” on your website
  • * Create an announcement bar on your website
  • * Guest posting on other blogs in your niche
  • * Guest appearances on YouTube Channels and Podcasts
  • * Bring your iPad to live events – great when used with contests 🙂
  • * Promote on Social Media

The key to building a strong list is not to forget, you need to ask people to join. Point people to your content consistently! they won’t get annoyed as long as you are doing it thoughtfully and on a schedule.

Love this post? Share it with a friend.

Filed Under: Biz Advice Tagged With:

How to Start a Podcast (+ Free Canva Templates)

May 28, 2019 by Brittany 1 Comment

Most of you are a one-man show… and speaking of SHOW, maybe you want to have a podcast. We are SO into that and want to guide you there. A podcast is something a lot of you probably desire to have, but the hardest part is actually starting it. We have had so many of you reach out and ask us ” how do you start a podcast?” and even “what tools and resources do you need to start a podcast?”. We took some time last Friday and covered all of our favorite tools, tips and tricks for starting an amazing and highly listened to the podcast.

If you are not into watching the video replay, you can head down below and check out the step by steps from the video and even get out awesome FREE Canva design templates to help you get some awesome podcast art for your new show!

A 9 Step Guide for How to Start A Podcast

1. List 30-50 potential topics

If you are already making content, think about some of your topics and repurpose the videos or blog posts you already have into podcasts. If you need some ideas, check out our blog and video training on doing keyword research to help you brainstorm and come up with titles and tags for your episodes!

2. Set a day to batch record.

Batching is a busy person’s best friend. Batching podcasts means recording several in a day. Before you record, be sure to make bullet points of what you’d like to cover or questions for your guests. Be sure to send your guests their questions at least a day in advance.

3. Get a decent microphone.

I have a Yeti mic but you can also get a Rode lapel mic for on the go recording. I have a client that travels a lot, and she even records her podcast while she’s at the airport! #noexcuses

4. Edit Your Podcast

We recommend you use a program like Adobe Audition or Garageband to record/edit your podcast. If you don’t have a ton of time, you can find companies that will edit and even transcribe your podcast for you!

5. Get podcast art made.

You can use a site like Fiverr or Upwork to do this. Bonus points if you get graphics templates made that you can use for social media as well. (Need help with this step? Check out our freebie below!)


Weeknight Website Podcast Templates by Weeknight Website

6. Pick Music and Write an Intro

Pick fun intro music and write your intro/outro statements. Create an intro and outro you can repurpose every episode.

For example, “Welcome to the ____ Podcast, the podcast where we ____” and then “Thanks for listening to the ______ show. Be sure to subscribe so you don’t miss out on more great episodes just like this one, and if you haven’t yet, join our Facebook group…” etc.

Pro tip, be sure to point folks to your social media channels!

7. Sign up for Libsyn.

When your podcast is ready to go, you can upload it here, specify the platforms you’re going to broadcast it on, and add show notes + tag it appropriately.

(Looking for a free alternative? Check out Anchor.fm)

8. Pick a day that your podcast goes live.

When it does, be sure to post on social media about it. Ideas for social media posts: a branded post, a photo of your guest,

9. Add it to your Website

When your podcast is live, add it and the transcript to your website! We LOVE the Smart Podcast Player plugin for WordPress and use it on our Weeknight Website platform and are affiliates for it. You need to buy a license for the player, but it is the best experience on your website for your listeners. We will include the link to the player in our video notes. Adding the player + your transcription to your blog on your website will be great for your SEO ranking!

BONUS:

There are some GREAT courses that go into the nitty-gritty of launching your podcast, like Patt Flynn’s Power Up Podcasting course. It’s a great way to learn how to launch your podcast appropriately to get the best return for your time.

And there you have it folks, nine steps to get your podcast off the ground!

Filed Under: Biz Advice Tagged With: podcast

How to Do Keyword Research for Free (FREE Spreadsheet)

May 21, 2019 by Brittany 2 Comments

Doing proper keyword research can be hard sometimes. Especially when you are trying to do your keyword research for free. So we decided this week we would show you all of our favorite secrets for exactly how to do keyword research for free so you can get your website ranking on Google.

Good news, if you use Weeknight Website as you WordPress Builder, we have Yoast SEO already preinstalled which will help you actually get your target keywords ranked easier on your pages and your blog posts. We have a lesson on getting that set up in your dashboard to make sure you are making Google happy with your content and letting them know how amazing you are and that you deserve to be RANKED HIGHER for that keyword you worked so hard to find.

The tools we use and the steps we cover in this mini-lesson are all listed below so you can follow along with us click by click! Also, make sure you grab our free spreadsheet download at the bottom! ????


Keyword Research Tip #1- Brainstorm (:30 to 1:37)

This looks a whole lot like grabbing a piece of paper and writing a bunch of stuff down. Okay?

I want you to think about what are some of the terms that if someone was looking for your topic on Google, what would they type into the search bar?

For my example today I am using one of my own sites. I run a website called ketoisforgirls.com. The goal is to teach women how to do Keto Diet properly

I start by asking myself… what would I need to know if I was a beginner?

  • How to start a Keto Diet for beginners
  • Kito Diet
  • Kito Diet plan
  • Keto meal plan

All right, so there are some of my ideas. Next, I’ll show you what to do with those ideas. What I want you to do now is go ahead and do this for yourself. I will be right here when you get finished!


Keyword Research Tip #2- Use Ubersuggest (1:37 to 3:07)

Open a tool called Ubersuggest from Niel Patel. This is going to help you expand your terms. It’s going to give you all of the stuff that you maybe didn’t think about. Ubersuggest will recommend synonymous keywords that are helpful that you can add to your site to help you rank for more than just that one term (which gives you MORE traffic).

These are going to be key terms that are a really great opportunity because the competition is low and the traffic volume is high and that’s what we want to see. So after you do that, you’re going to go make a spreadsheet of your ideas.

Because we love you guys… We made you a free spreadsheet that you can use for your very own!

Keyword Research Tip #3- Use Keywords Everywhere (3:07 to 3:58)

This handly little firefox or chrome extension is a lifesaver for me! I love Keywords Everywhere to see what all my competition and search volumes for my site is.

This tool will make your search results look a little like this right here…

How to Do Keyword Research for Free


Keyword Research Tip #4- Update Your Spreadsheet (3:58)

Next, make sure you update your spreadsheet per the instructions. I have added a color code for you to help you actually know which term is the main one and a count column for you to see how many times you have added the key terms to your page. as you build your site and optimize it for SEO, make sure you come back and update the spreadsheet.

Keyword Research Tip #5- Add them to your site (4:00)

The very last step, super easy, is to add the keywords to your website, which seems pretty easy, right?

But where do you even put them? You’re going to want to make sure you have them in your

  • Page title
  • Your Url
  • In your headers
  • Throughout your copy on your page
  • In the first paragraph of your page copy
  • Image alt tags

Pro Tip: Make sure you have some variations of it sprinkled throughout your copy. You don’t want to just say Keto for beginners the whole time. You want to mix it up and use other terms such as Keto Diet for beginners, Keto meal plans for starters. Use the other terms you added to your spreadsheet.

Make it sound natural and remember that you’re always talking to a person. You’re not just talking to Google.

Watch me do all these steps live! ???? (6:26 to 19:24)

Follow along as I do keyword research for free on my very own blog live on the screen. I will show you all my steps and how to do them for your self!

Want to learn more about SEO in general? Check out our Member Library with more tutorials just like this one! 

Filed Under: Build Your Site Tagged With: keyword research, marketing, SEO

How to Create a Beautiful Website Banner Easily (Pro Design Tips)

May 13, 2019 by Brittany Leave a Comment

Do you remember when your website was all new and shiny? The feeling of “anything can happen”? Then you start designing your website banner and it all goes downhill from there.

We know it like SUPER important that one website banner says so many things for you. The only problem is how do you make sure it doesn’t come out looking like a #nailedit meme from Pinterest?

We have some super awesome design tips from our resident web design expert… Kristen Estes. Check out the video below, or read the handy transcript below with step by step info!

Website Banner Tutorial Webinar Transcript

If you are new here at weeknight website, we host a weekly webinar every Friday at 12:00 PM CST. We love to be here for you. We can give you feedback even on things like your brand, your brand direction, website, and design.

This tends to be what can make or break a website. When people first land on your website, you really want them to feel impacted by your website banner. You want to capture them when they first get there because they’re making a snap decision whether going to stay on your website or whether they are going to bounce. We want them to stay, so here are our tips to help them make that decision.

1. Use Prebuilt Hero Rows

So what do I mean by this? Well, I want you guys to keep it simple. Remember you’re only trying to get them to do one thing per section. You really just need a headline, a sub-headline, in each section as your website visitor is scrolling. In Weeknight Website, we actually have prebuilt rows created for you. So, if you use Weeknight Website you can follow the directions below to create a website banner easily using our prebuilt rows.

Keep in mind that the hardest part is sometimes making the decision of what is my image going to look like and how to size it correctly. With Prebuilt rows, that is all done for you. All you have to do is choose what you want, your fonts and your buttons and your background to be.

2. Font Choice is Key

Thankfully, Weeknight Website comes with Google fonts pre-installed. This makes it easy to pick popular and easily use them on your site without having to install fonts. If you need help choosing fonts, colors and branding, we have a guide that you can access here to get more information on that. One of our favorite tools is called Font Joy. It can show you the best font pairings and help you decide which ones you need to use.

3. Make sure you have great photos for your website banner

A quick tip: Photo backgrounds, especially ones with people in them are going to be the most impactful on the Internet. If you have professionally done photos of yourself or photos of people in your space or enjoying your art or music or whatever it is that you do, those are probably going to be the best photos to the header.

However, I will say quality matters a lot. You really want to make sure that these are professional and large enough to be used in a space like this.

Next, You want to make sure that your photos are landscape oriented, which means that they are wider than they are tall. You don’t want portraits. When you use a photo that portrait oriented you don’t have as much control over what will show in the banner. You can absolutely use this photo elsewhere on your site, but I would recommend finding another photo on the Internet that is going to match a little bit better.

If you do not have professional photos or you need some that you can use for free, we recommend Unsplash. They have a huge variety of photos that have been put there for you to use by professional photographers and artists. Simply go there and search for what you need and then download the photos for use on your website.

Pro Tip: use an image compressor because the smaller your images are, the faster that your site loads. this helps with search engine ranking and also with user experience.

Thank you so much for reading and we’ll catch you next time!

Filed Under: Build Your Site Tagged With:

How to Make a Website Menu (the easy way)

May 10, 2019 by Brittany Leave a Comment

Hey all you ambitious people out there, we see you. You are the DIY-ers. The ones that love a good challenge and love to be able to actually get things done and feel super accomplished. Well, we got you! ????

We know how frustrating it can feel to try to build a mobile-friendly website header only to have it look less than appealing when you get done. That’s why we recorded this super short tutorial with all our best tips and tricks for you.

We are using Weeknight Website as our builder (duh) because it’s literally the BEST all in one website tool out there. Trust us, we have tried them all… ????

So, check out the video below and get your website menu #done. The video is a step by step of how to build your website menu on WordPress.


Step by Step for how to make a header that is mobile responsive:

You may be asking… How do I make my website header? How do I make it responsive? Please note that we are using Weeknight Website and if you are using another theme or builder this may not work for you the same way.

1. Create a Menu.

Some of you guys are jumping right in thinking, “I need to make my website header” and you don’t even have a menu yet. So first we’re going to cover that. Okay?

Go to appearance> menus. If you don’t have a menu set up yet, what you’re going to do is create a new menu.

Here are some options:

  • You can select specific pages
  • you can add your posts,
  • you can also do custom links if you want.

For example, if you have a page that’s somewhere else on the internet (like a facebook fan page for instance), but you want to make sure that its easily accessible just add it as a custom link. You can add the link where it says custom URL and then add a name below that.

2. Create the Header

Go to Builder > Themer layouts > Add New (next to Themer Layouts at the top of the page)

Name this whatever you like, but we recommend header to keep it simple! 😉

Here are some options:

  • Sticky: means that as the person scrolls down the page, the menu sticks to the top.
  • Shrink: means as the user scrolls, if it sticks to the top and shrinks up a little bit
  • Overlay: this means does the menu lay over the top of the page transparently or does it have its own separate spot.

Prop Tip: If you want, you can have different headers for different pages on your website. For instance, if you want your blog to have a different header, you can actually make it so that all singular and all archives have a different a header that shows for those pages.

For this example, we are doing a header that will appear on the entire site (which is what most of what you are going to want)

After you have selected all your settings, go ahead and hit publish.

3. Build the header

Click the blue button to open the weeknight website builder

The default that it brings me into is a really plain blue layout with some links and basic navigation. So what we want to do is first is to change our menu to the new menu that we’ve created.

Pro Tip: You might have noticed there is a new trend we call “flyout menus” on websites. This means that the menu just always appears in one corner or another with a 3 lined icon called a hamburger icon.  When you open it up, you get the entire menu. If you want it to do that, what you’re going to do is under “responsive” select breakpoint “all devices” 

Now chose the layout of the menu you want to use.

Drag in your logo, menu, and social icons into place and begin to resize for all the devices by hitting the R key on your keyboard.

Once you have a header that makes you happy be sure to click the “Done” and then “publish” button.

We can’t wait to see what you’re building. We are so very proud of you for taking the time to do something for yourself.

Filed Under: Build Your Site Tagged With:

  • « Go to Previous Page
  • Go to page 1
  • Interim pages omitted …
  • Go to page 5
  • Go to page 6
  • Go to page 7
  • Go to page 8
  • Go to page 9
  • Go to Next Page »
  • Privacy & Terms Of Use

A NetCrafted Company. All Rights Reserved.

Our website uses cookies and related technologies to improve functionality and performance.
Privacy Policy